User Guide
Overview
The Dropbox Sign for Procore User Guide is intended to help Procore users send project documents for electronic signature using Dropbox Sign. This guide assumes that the initial configuration has already taken place.
Sending a Document for Signature
First, navigate to any of the following tools:
- Commitments
- Prime Contract
- Change Order
- RFI
- Inspection
- Correspondance
- Submittal
Then, find the object that you wish to be signed.

Next, export the contract by selecting Export > PDF.
This will open the contract in a new window. Download the document to your device.
Open the side-panel app by clicking on the Dropbox Sign logo on the top right of the page.
Select Browse for file and browse to the recently exported file.
Add signers using either the Add Procore User or Add External E-Mail buttons
- Add Procore users by selecting them through the user address book
- Add signers via External E-Mail by typing in the signer's e-mail and name.
- For multiple signers, the signing order can be changed by clicking the directional arrows on the blue bar next to the signers names.
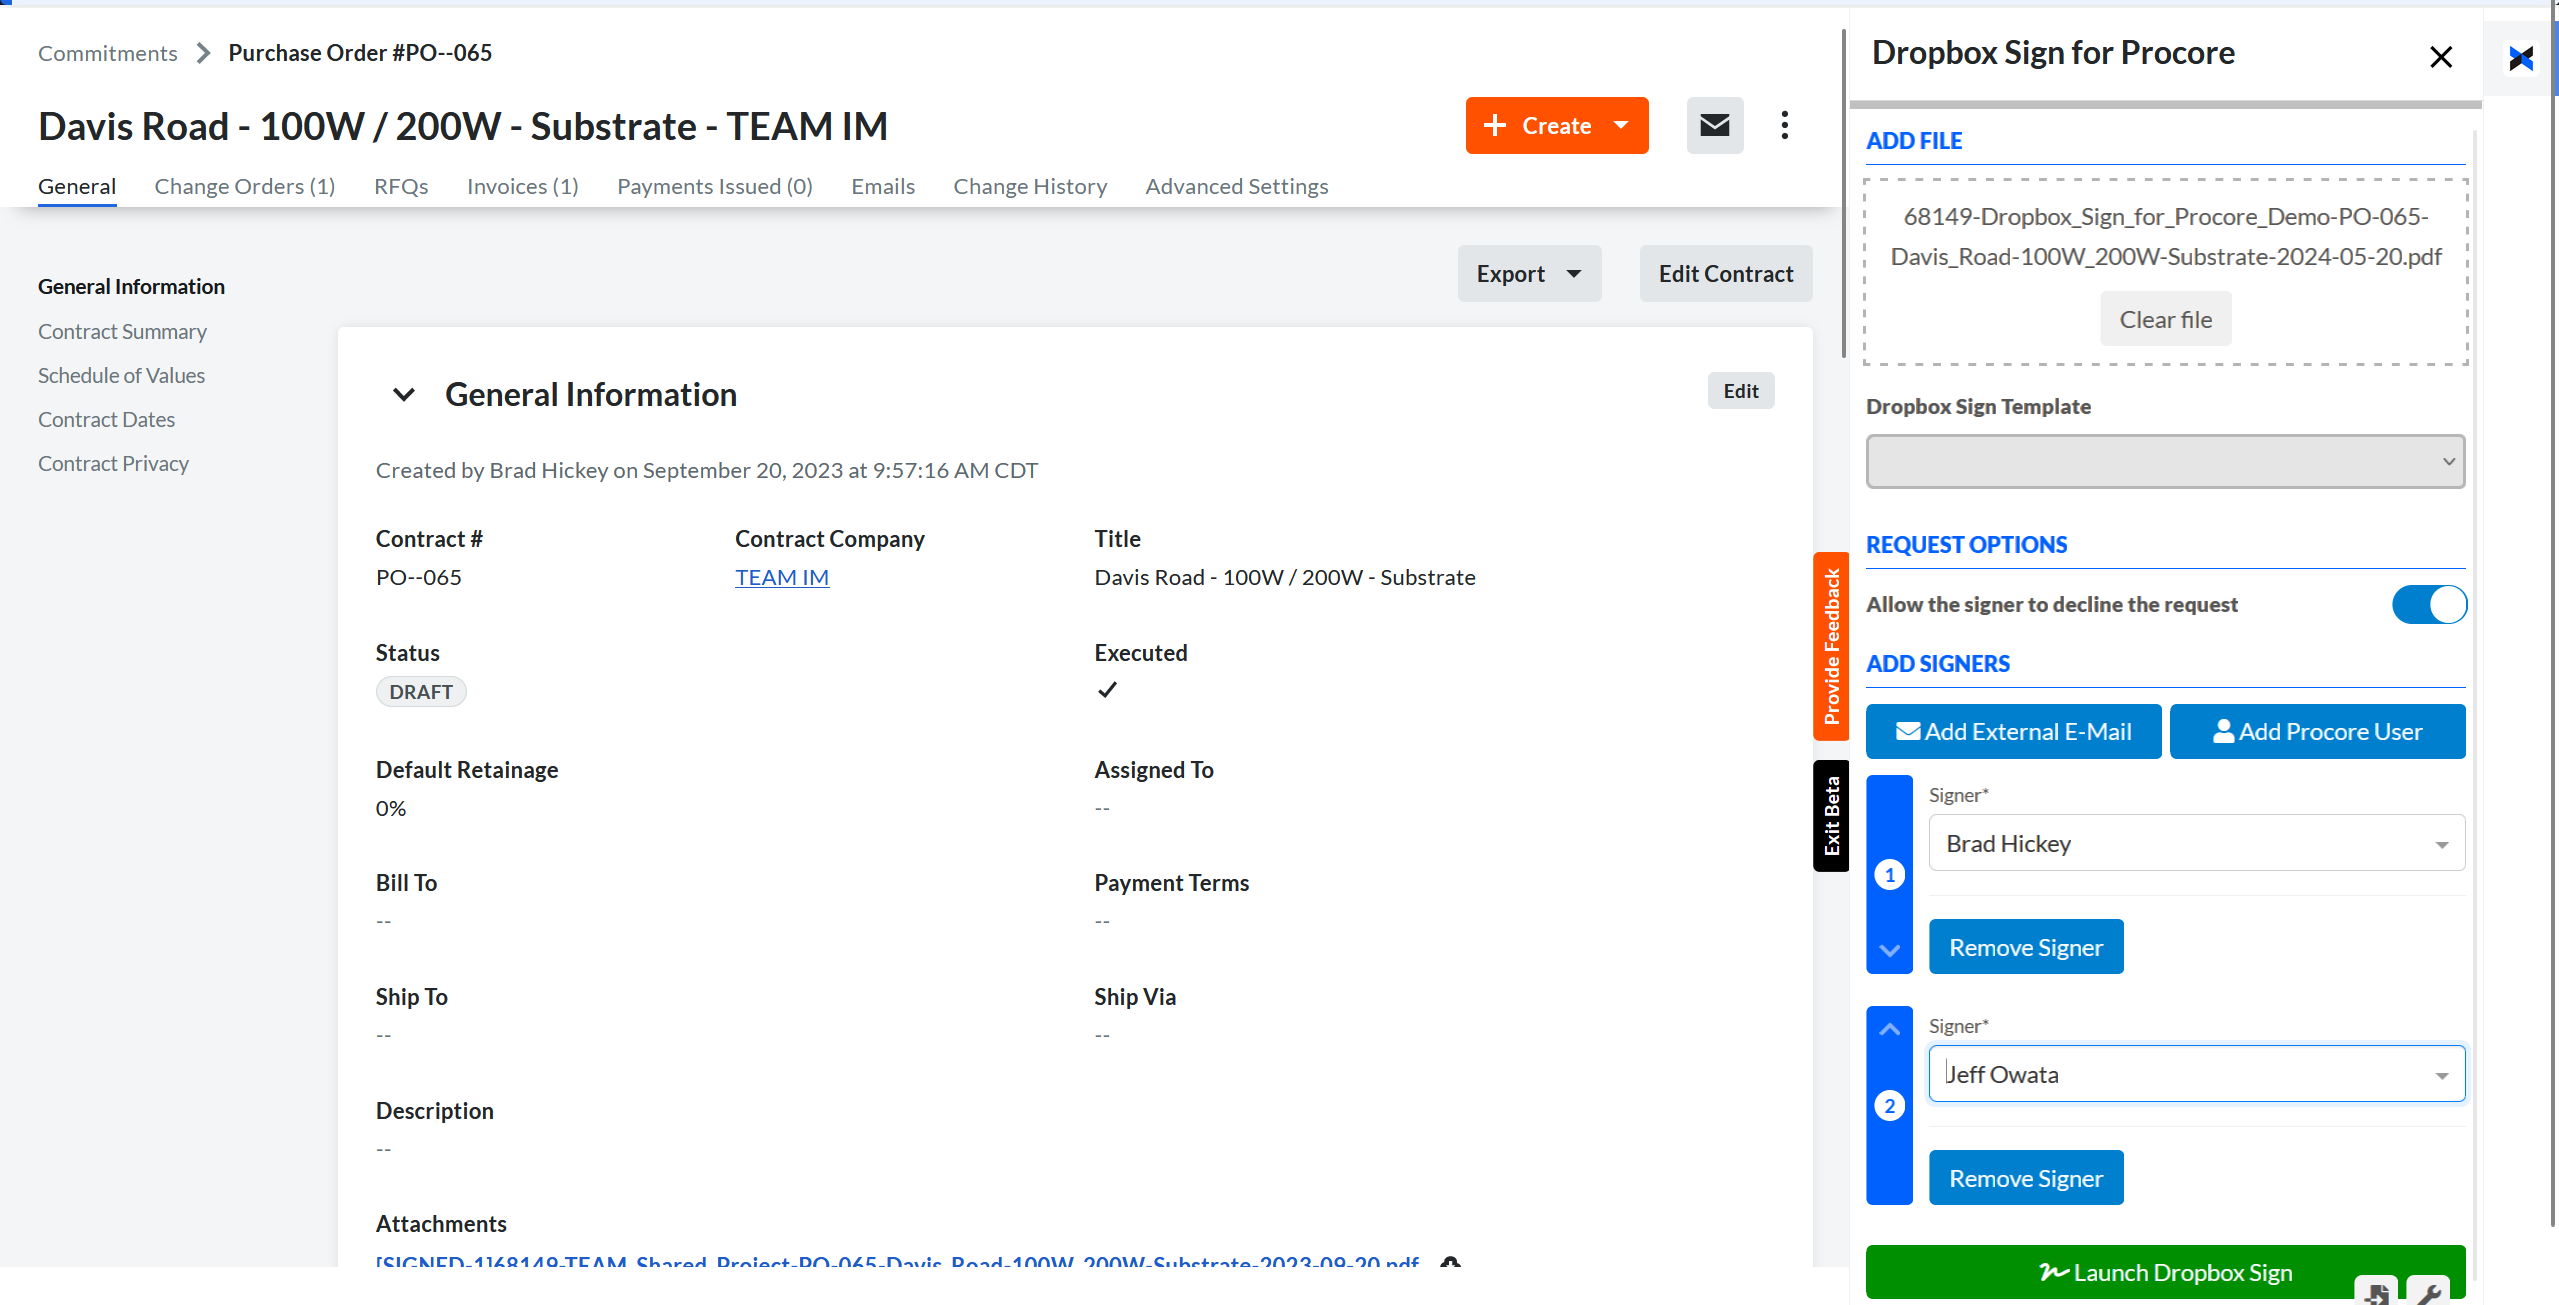
Once the signers have been identified, click the Launch Dropbox Sign button to launch the Dropbox Sign Embedded Requesting tool to finalize the details of your request.
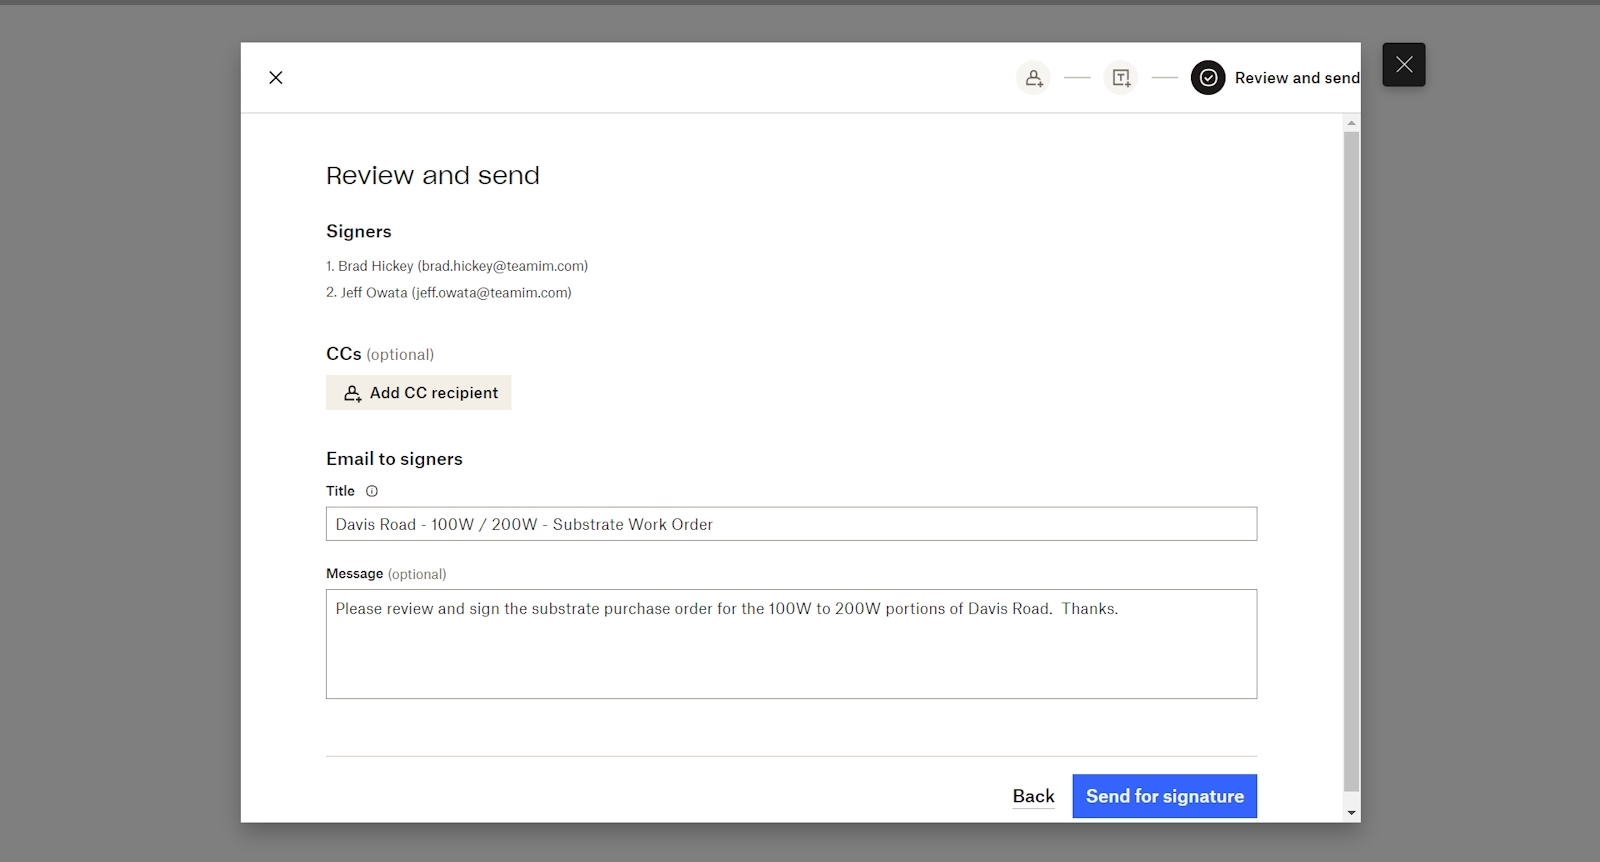
First, make sure your signers are correct.

Next, place the signature locations and any other data that should be gathered from the signer.

Lastly, modify the e-mail that will be sent as part of the request.
Press the Send for Signature button to send the request.
The signers will be notified via e-mail.
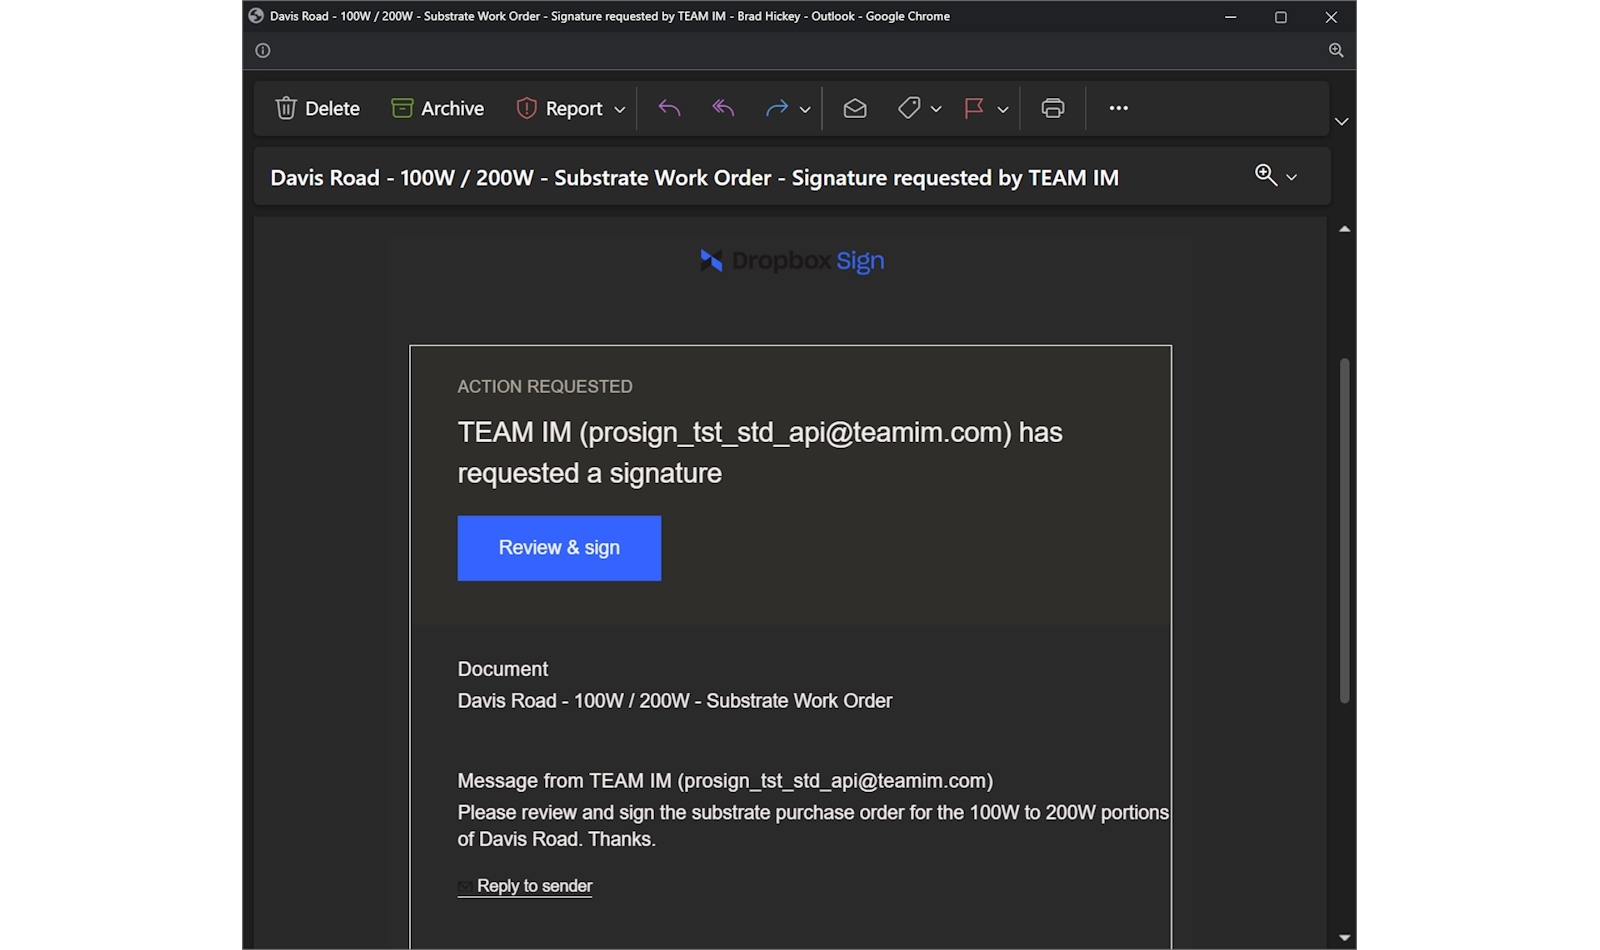
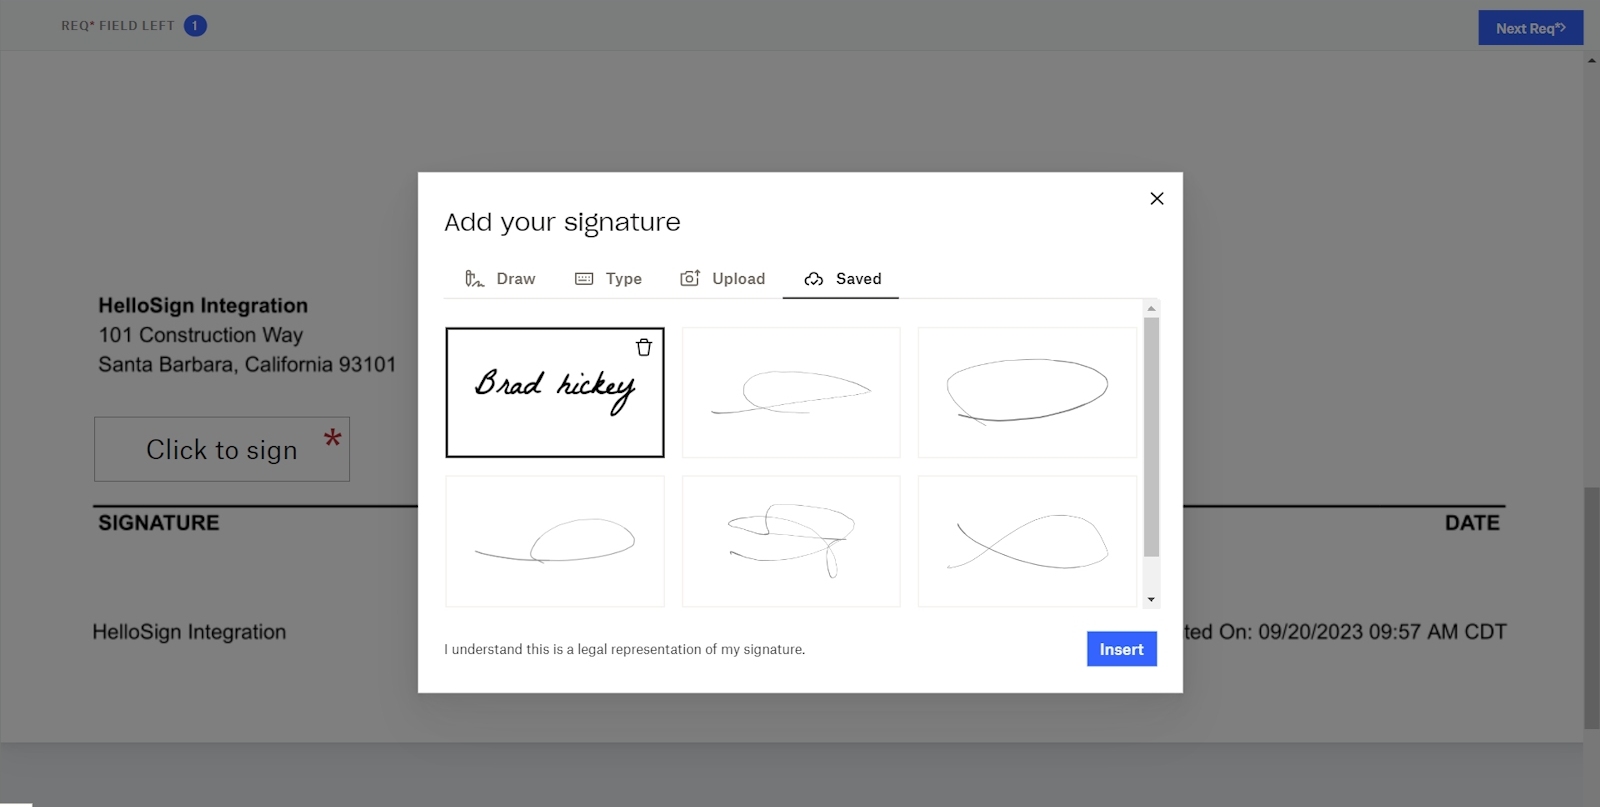
Clicking Review & sign will allow the person to complete their portion of the signature request.
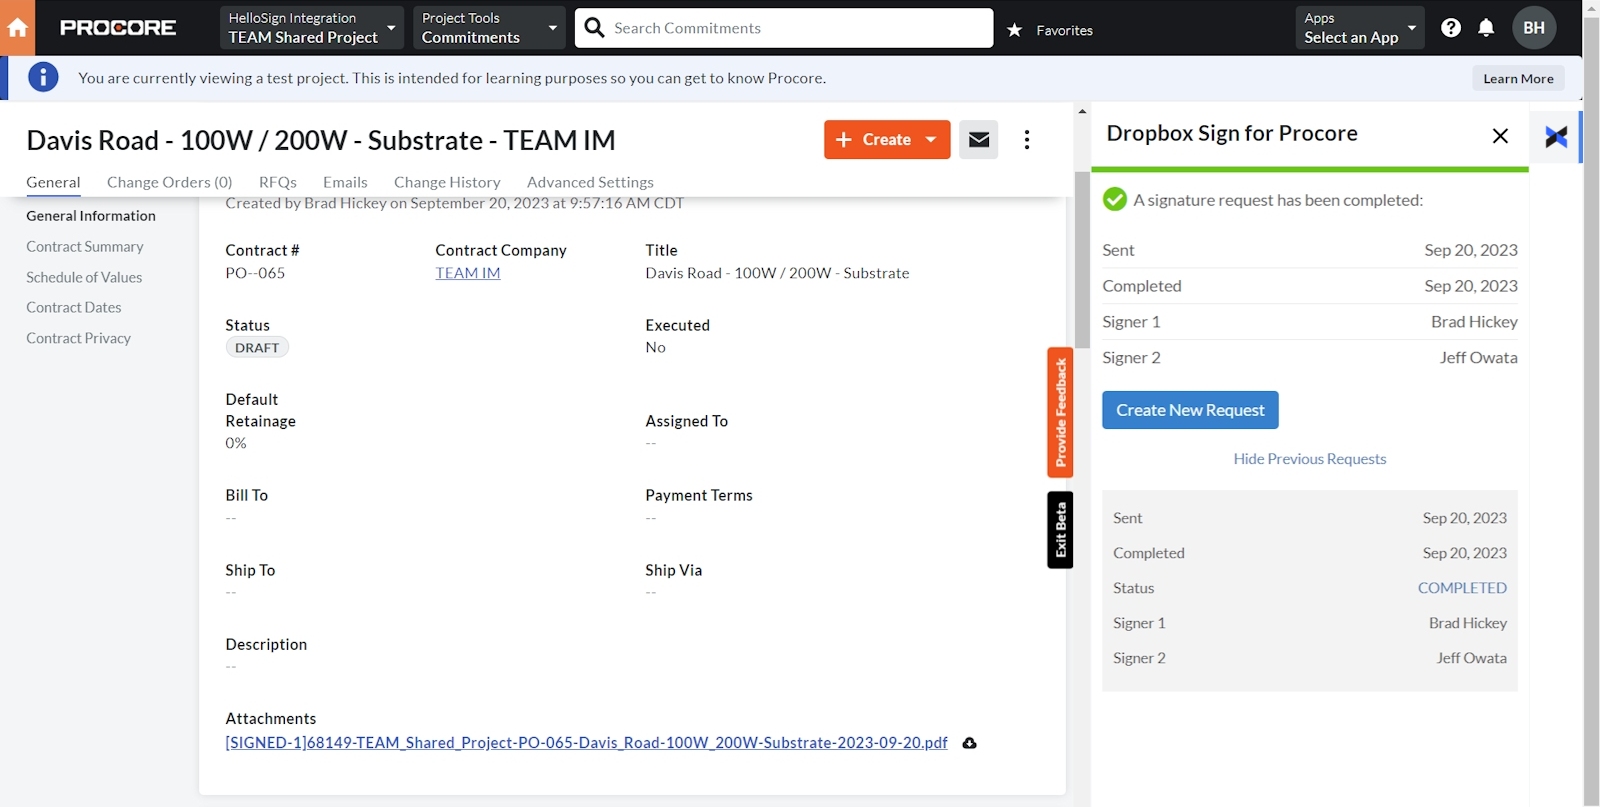
Once all parties have signed, the executed document will be added as an attachment to the contract.
The side-panel can be opened to view the history of the signature requests for each contract.