Inspector User Guide
Overview
There are two primary roles within Inspection Management. One role is reserved for those who will be doing the Inspections and filling out surveys. The role of Inspector is meant for those who will be filling out Surveys and doing the inspections in the field.
Within Inspection Management permissions within the application are assigned to each roles. The inspector role allows users to create surveys, view their projects, view actions and notifications, and search the application to find relative information in order to complete inspection surveys.
Application Navigation
The Inspection Management application is easy to navigate using its navigation system. Users can click the top left hamburger menu where they are able to view specific features and pages based on their permissions.
Standard users can see the following within the navigation menu:
- Home: Where users can view their inspection surveys and create an “on demand” survey
- Actions: Where users can view any actions required of them
- My Projects: Where users can view their projects and details regarding the project
- Search: Where users can search by project, work area, and survey and find results
- Role/Account Info: Where users can create their e-signature as well as view their role, permissions, assigned projects, and personal information such as name and email
- Dark: Where users can toggle between light and dark mode
- Messages: Where users can view system-wide messages
- Language: Where users can select which language they’d like to use the app in
- About: Where users can view system information regarding the app
Home
Home Landing Page
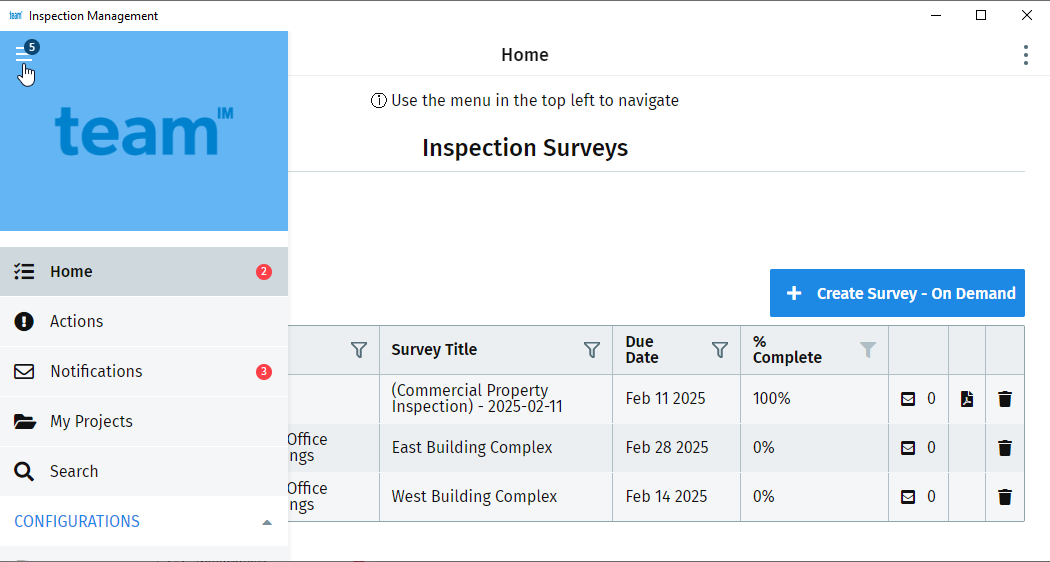
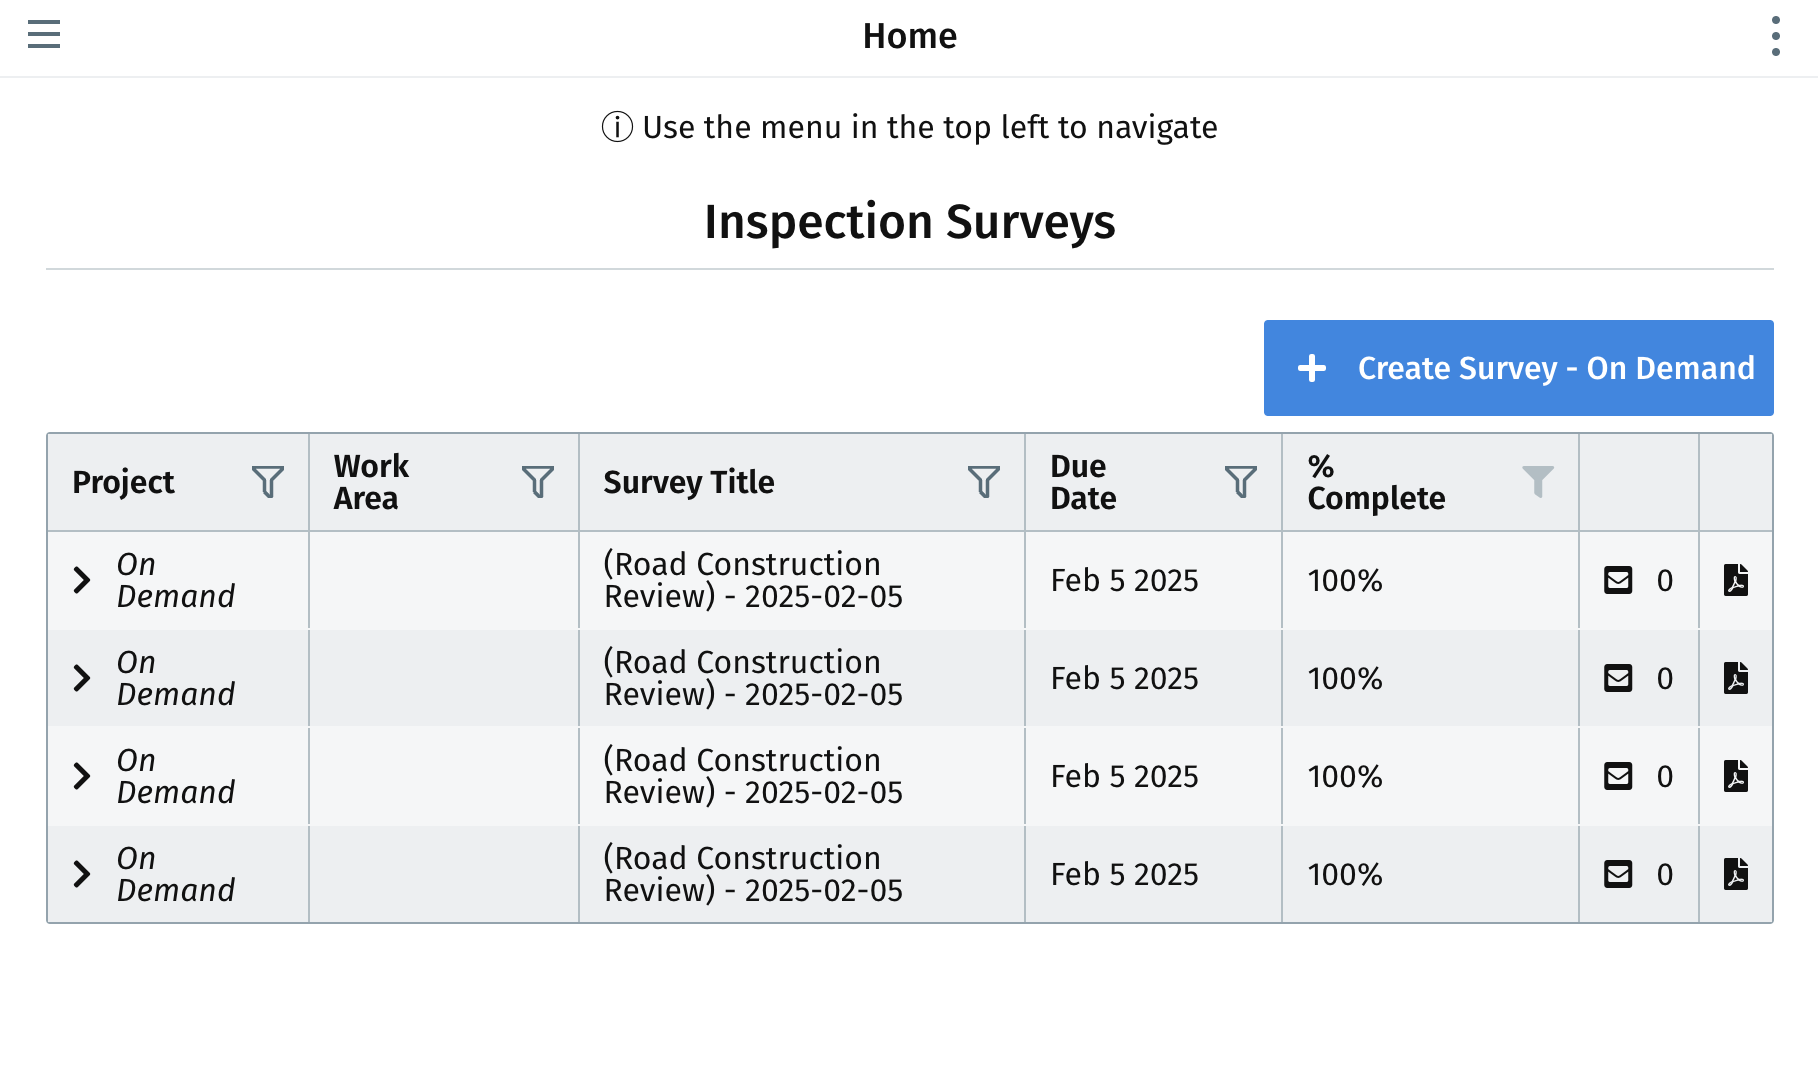
The “Home” page is the main landing page for inspection management. On this screen you’re able to view survey details such as the project and work area the survey is associated with, the survey title, due date, and percentage complete. Users are also able to search for a survey within the search bar and delete a survey if it’s no longer needed or applicable by clicking the trash can within the survey row within the survey table.
A user can also select one of the surveys listed on the Home page and be brought to an edit screen where they’re able to update and add information to the survey, complete the survey, and submit the survey for review.
Creating an On Demand Survey
Inspectors can create an “on demand” survey from the Home page by selecting the button on the top right called “Create Survey- On Demand”. From there, Inspectors will be brought to the “create Survey” popup where they can search and select a survey template to create their survey from.
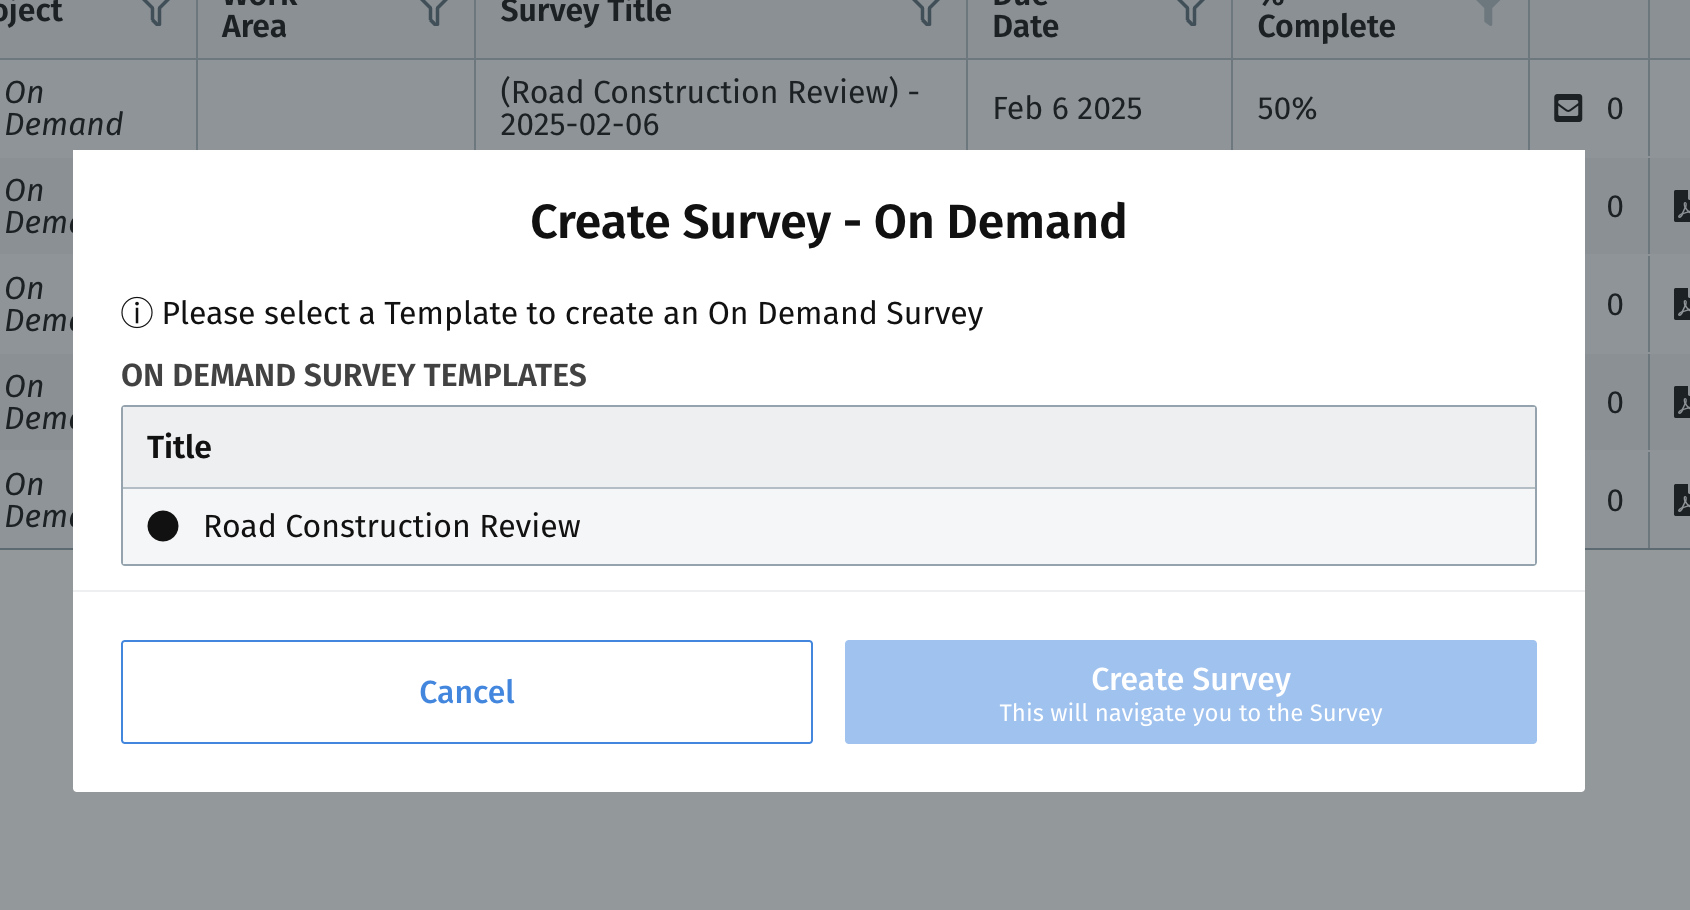
Once a user selects the survey template, they can select “create survey” and be brought to the newly created survey to enter key information and complete the survey. Inspectors are also able to view a secondary navigation on the lefthand side of their screen to view survey-specific navigation options:
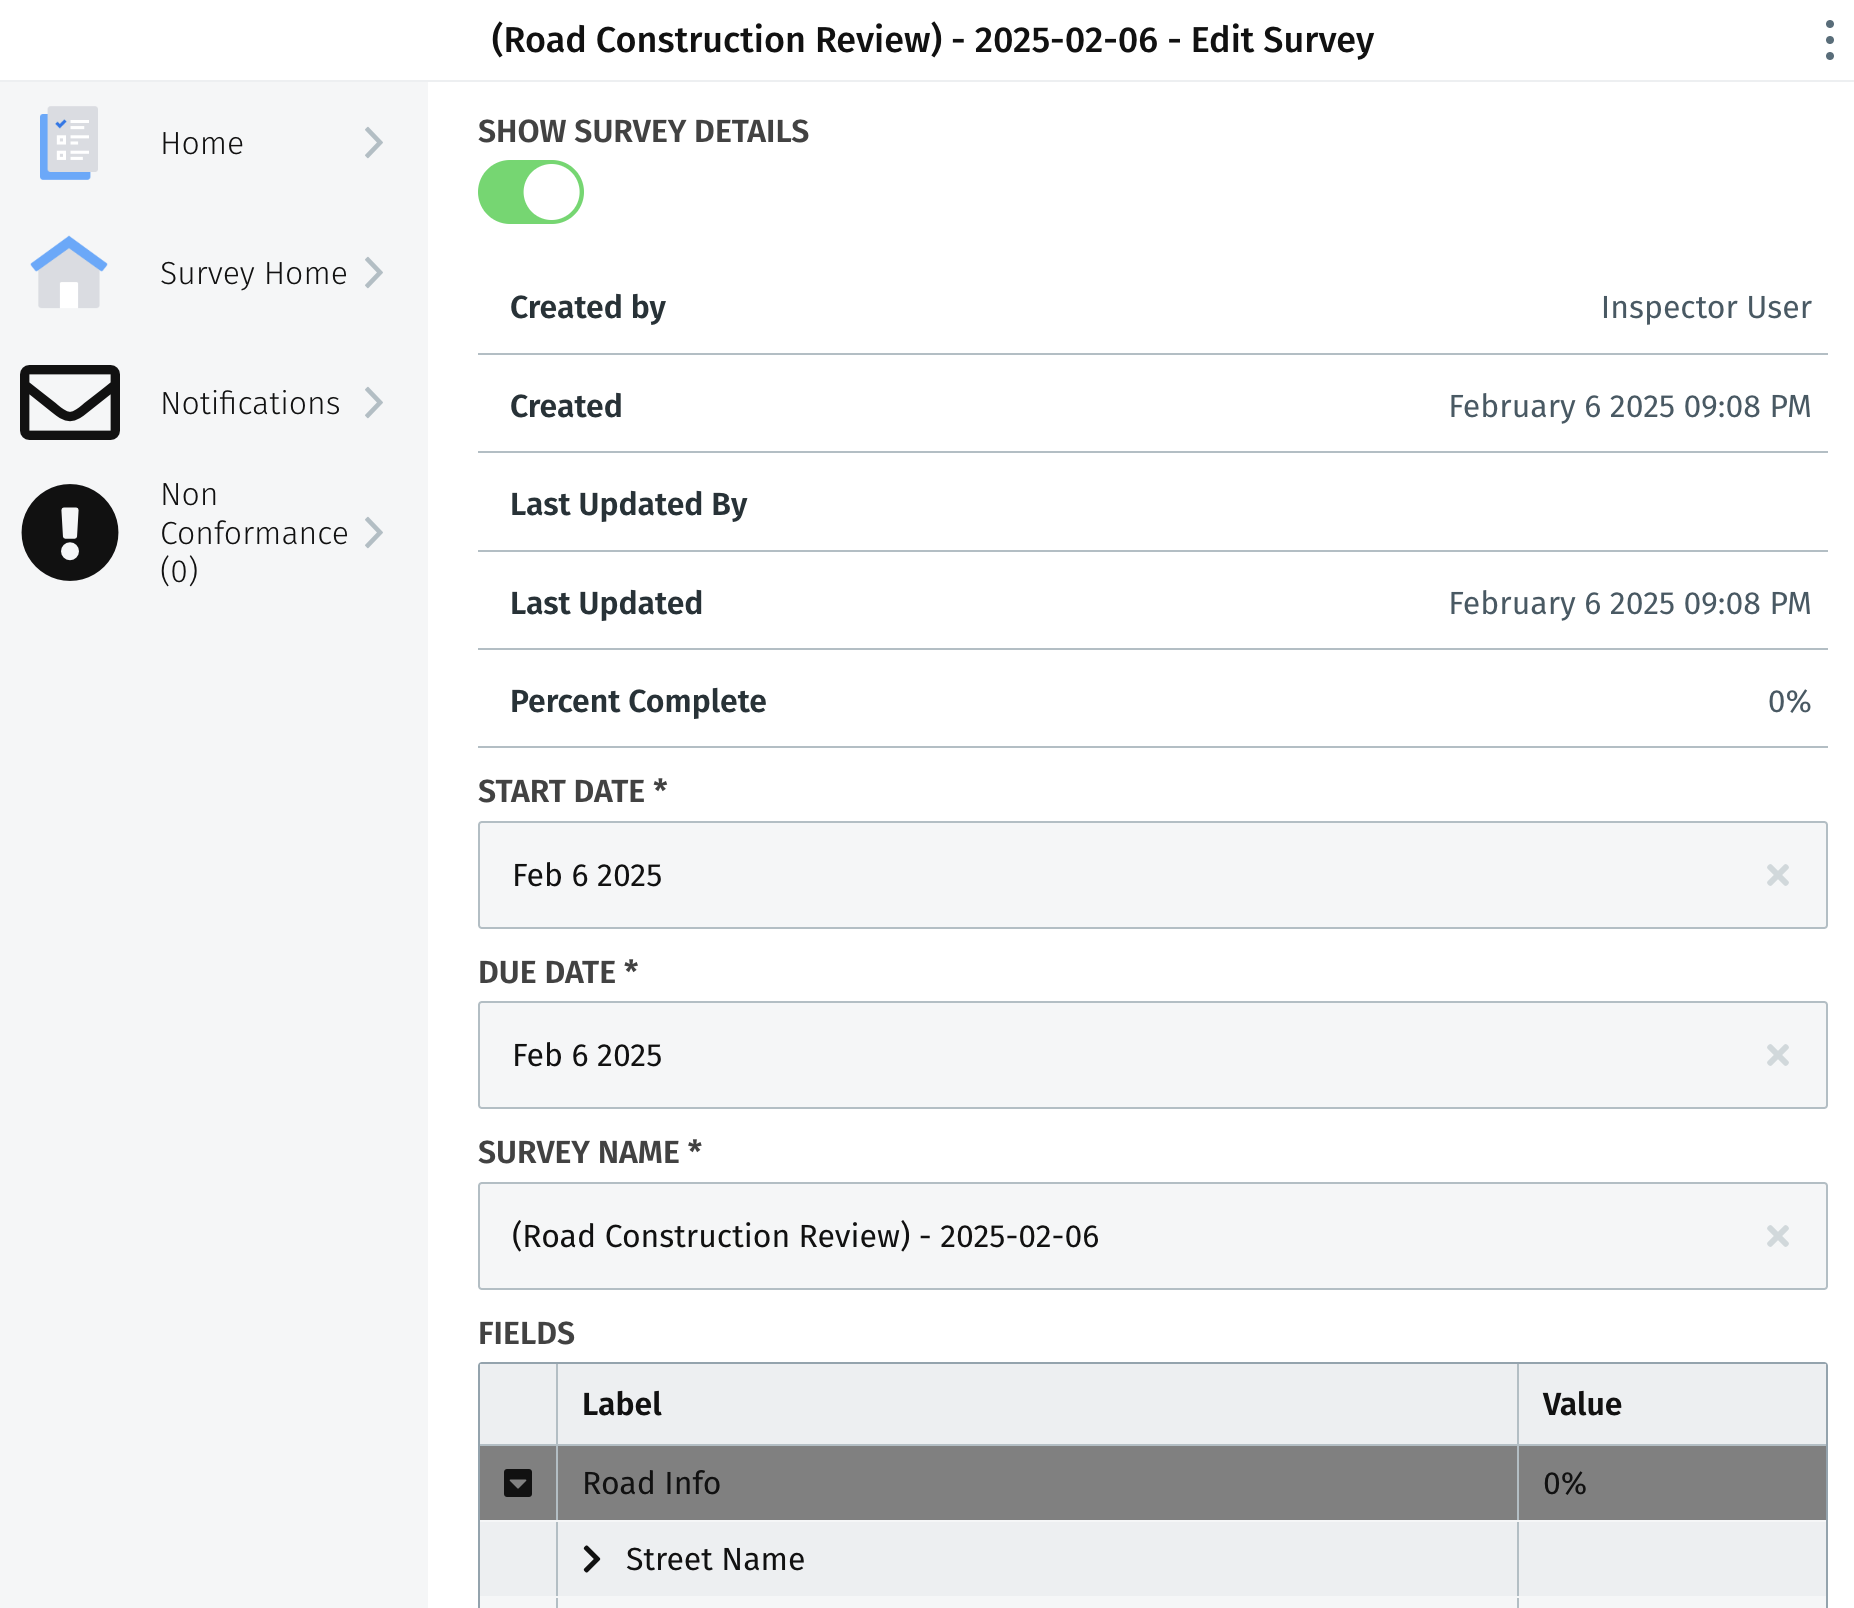
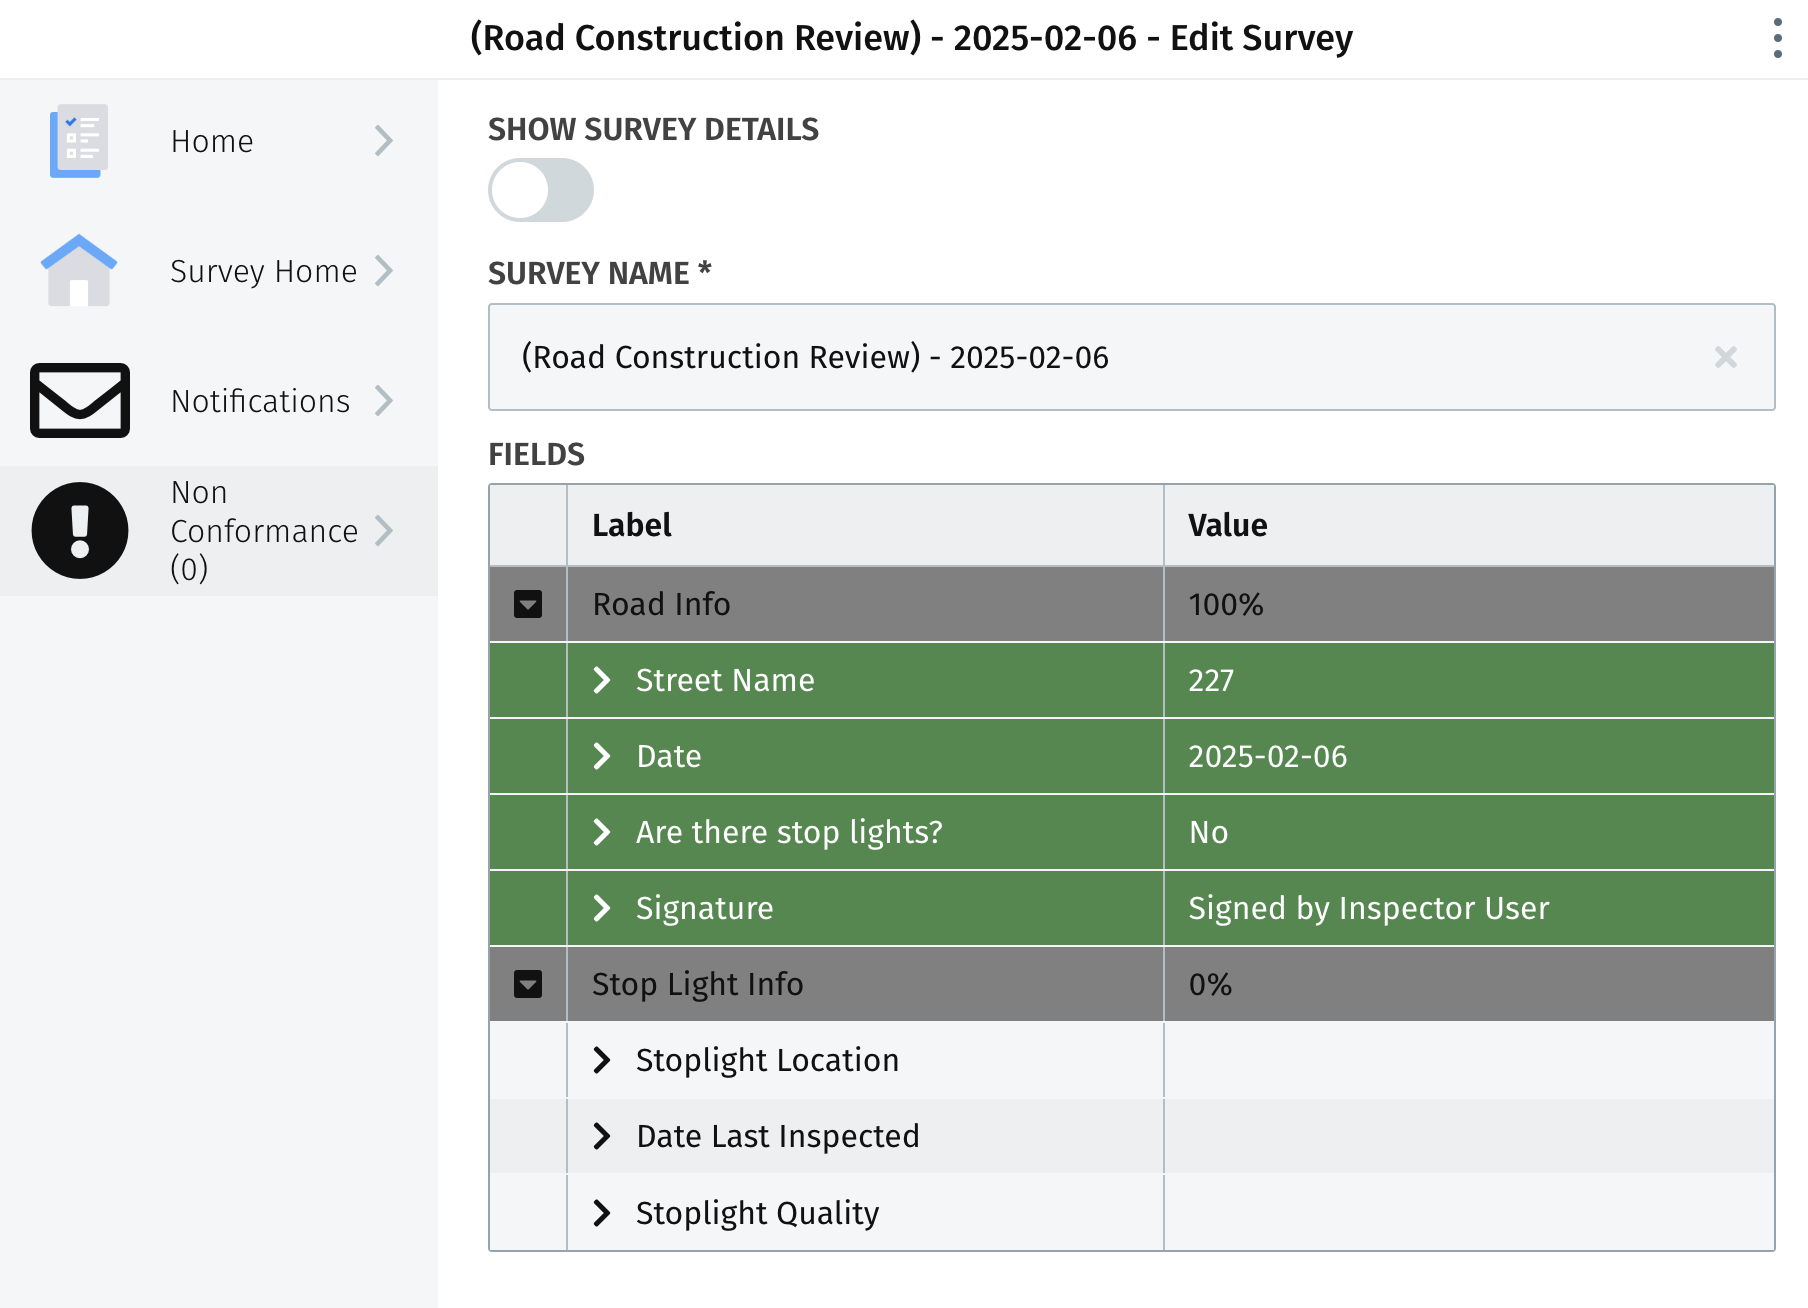
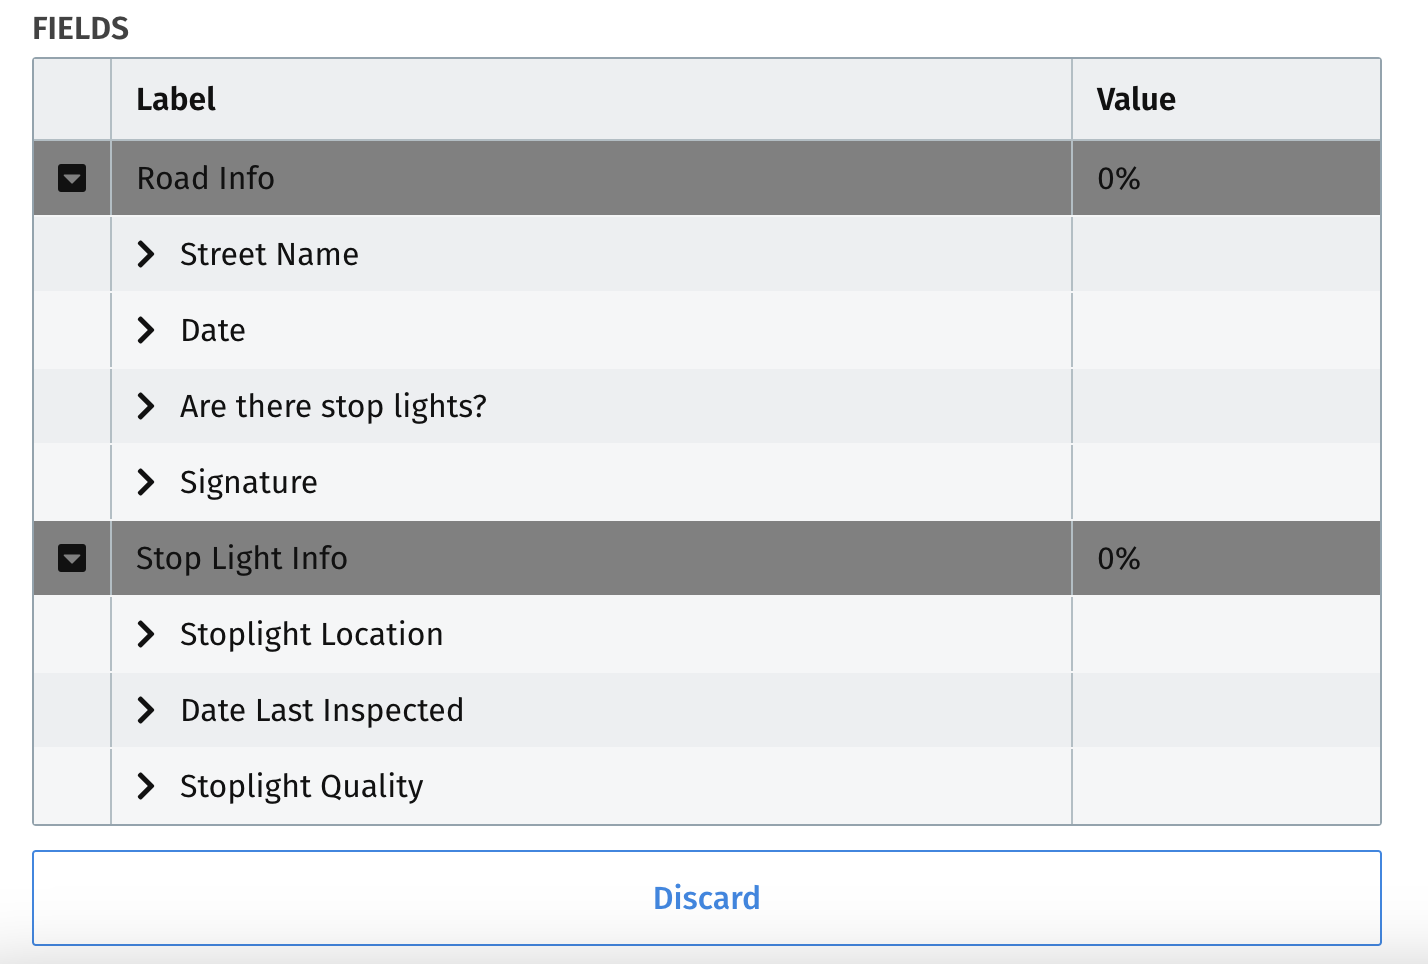
After entering the initial critical survey information such as start date, due date, assigned to, and survey name, a user can then begin the survey by selecting the first survey question row within the “fields” table and filling out the survey questions:
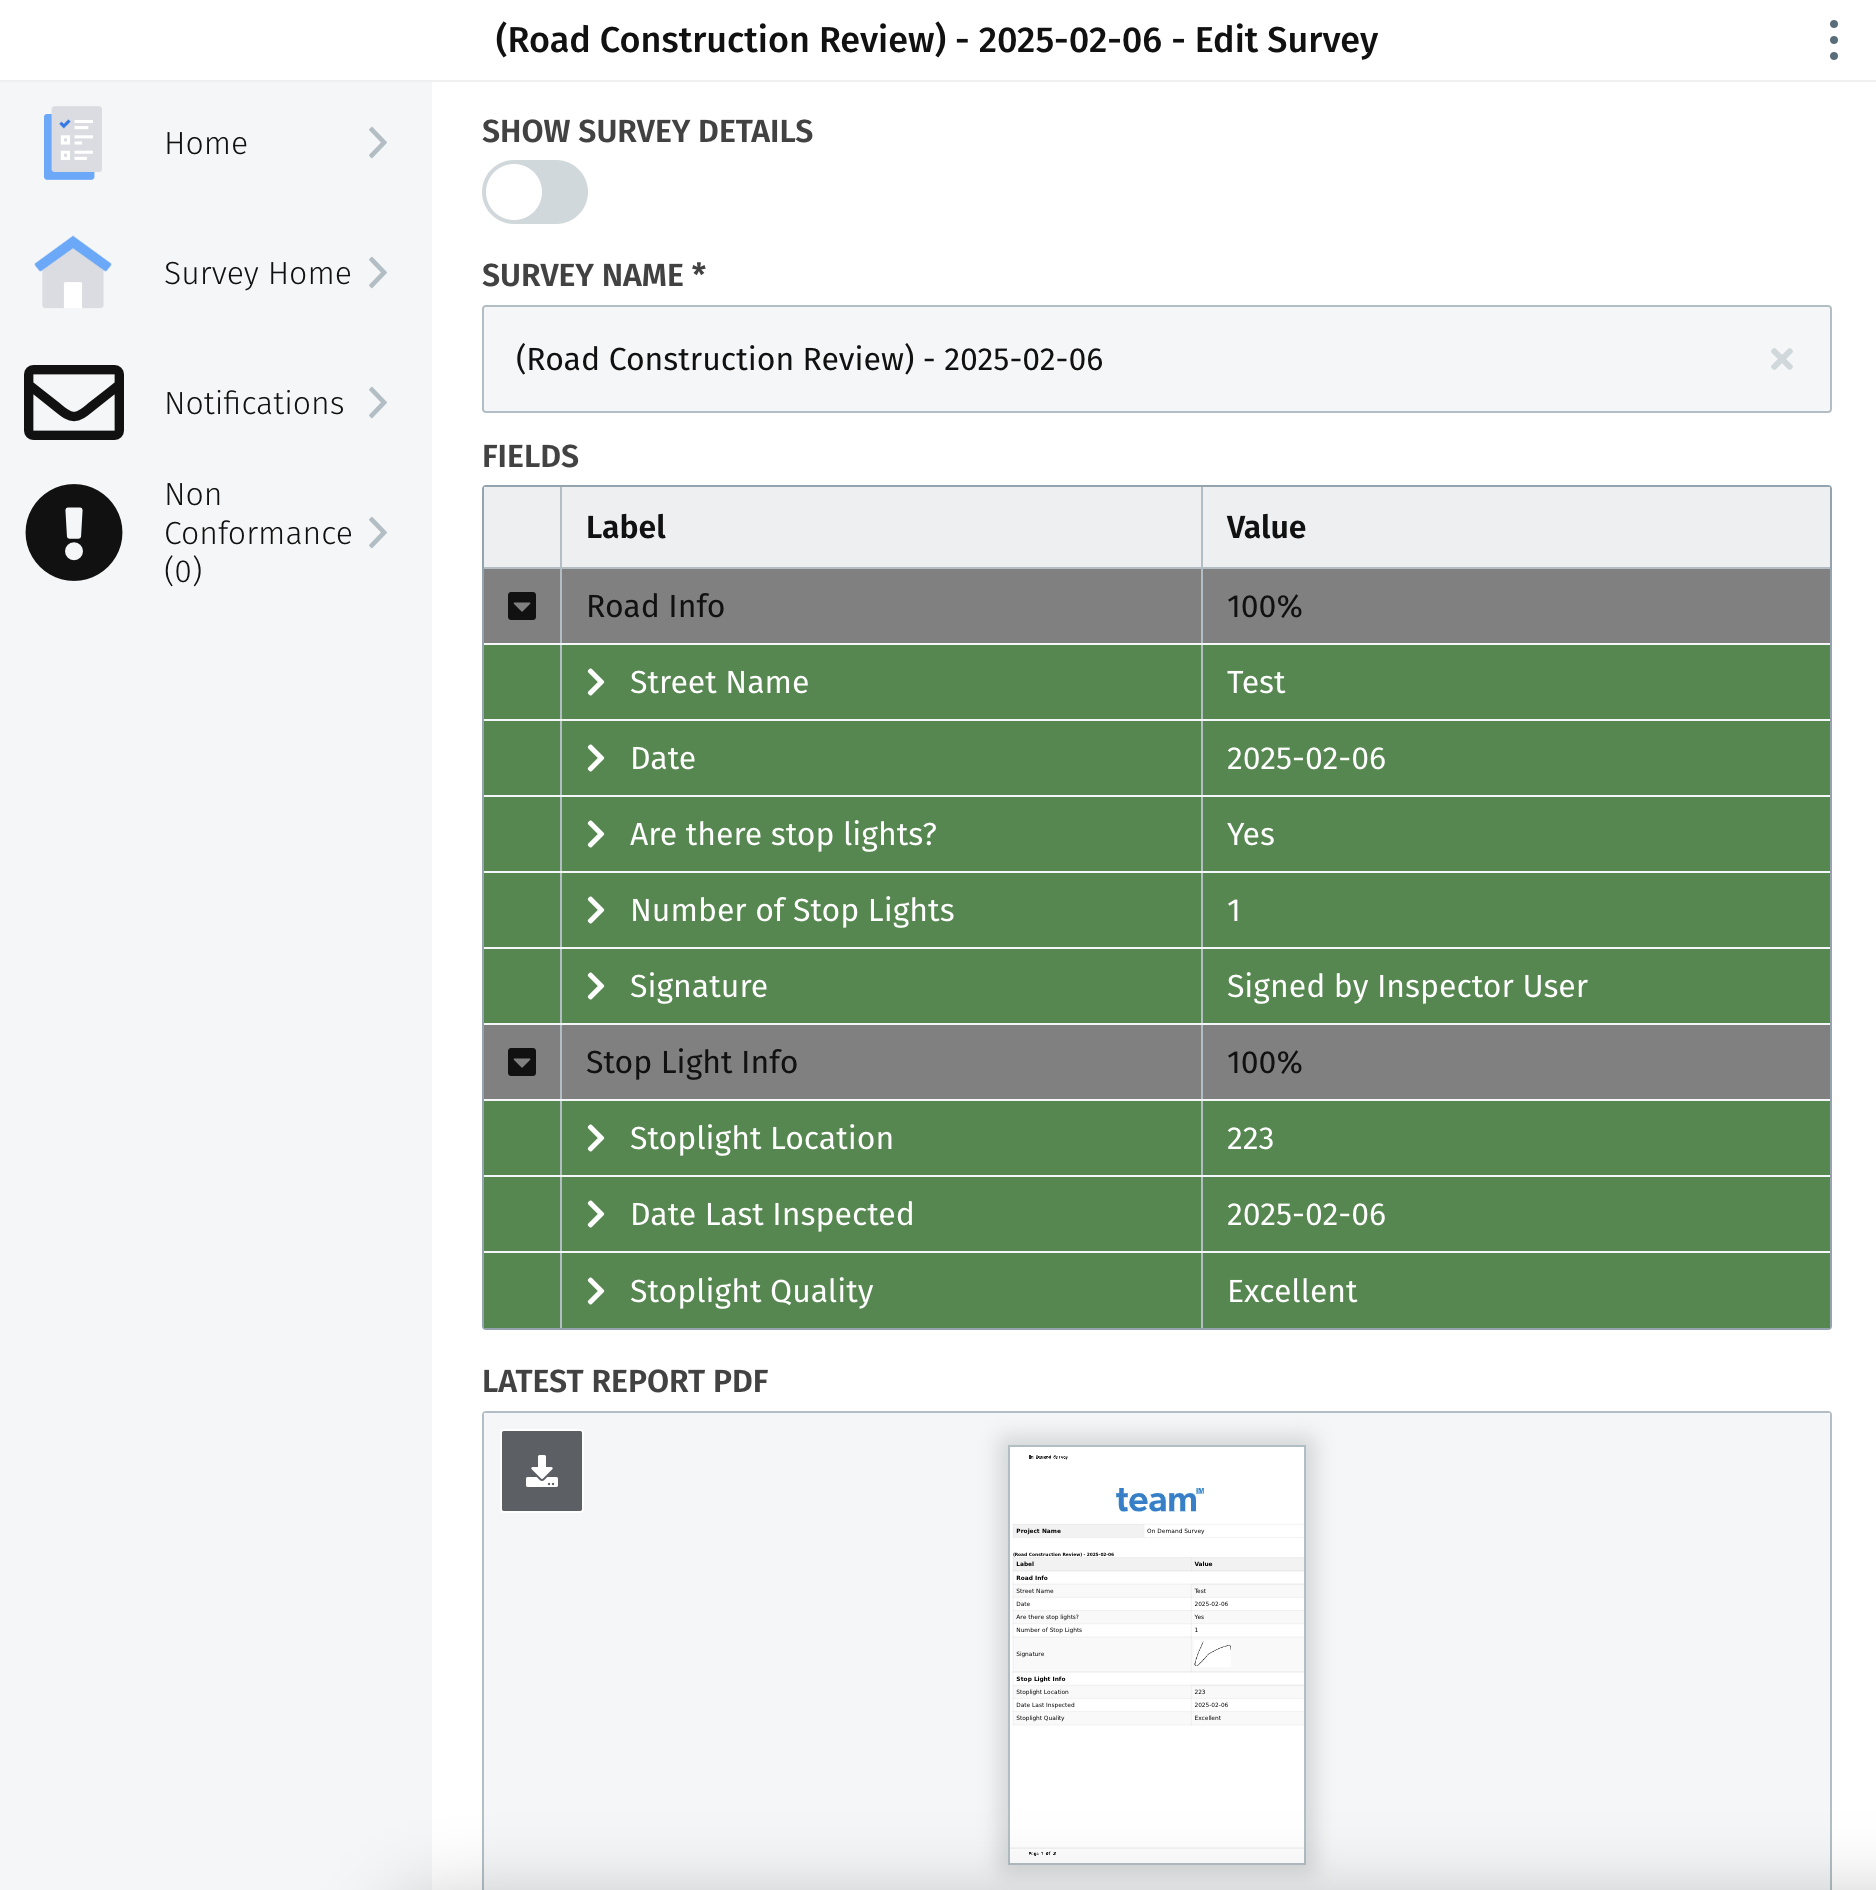
Once a user completes the survey, all rows within the “fields” table within the survey home page will note 100% complete and the survey will be submitted for review. An inspector can select "refresh report" to view the updated report PDF.
After a user submits their survey for review, their manager will be notified that the survey is ready for review and sign off. The user can also view the updated survey within the To Do landing page.
Actions
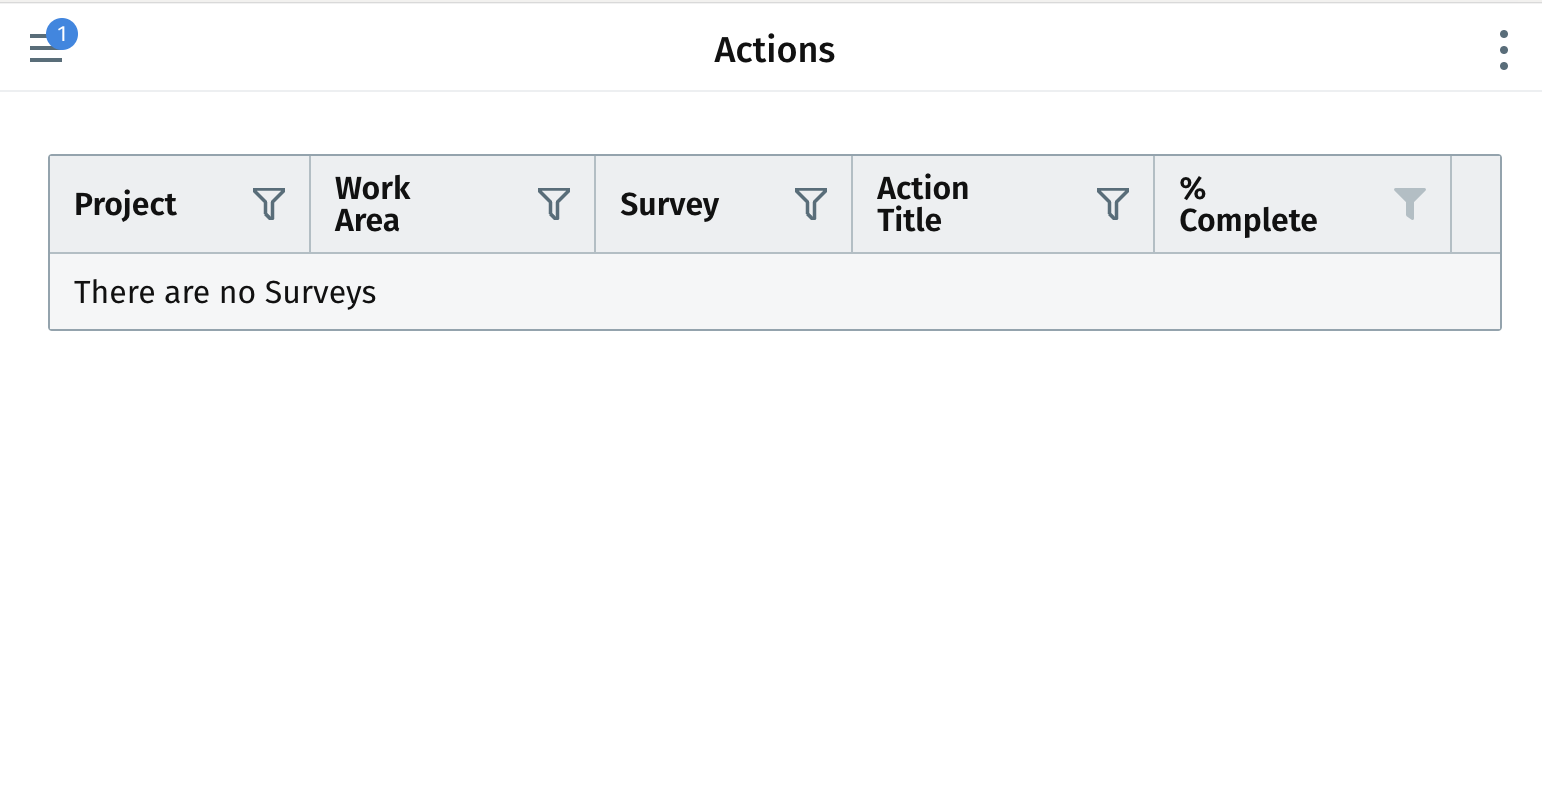
A user can also go to their “actions” page from the navigation menu and be brought to their actions landing page. This screen provides details and information about what actions are needed on their end. Action Surveys are the result of some Action that was taken while filling out a different survey, such as a non-conformance.
Notifications
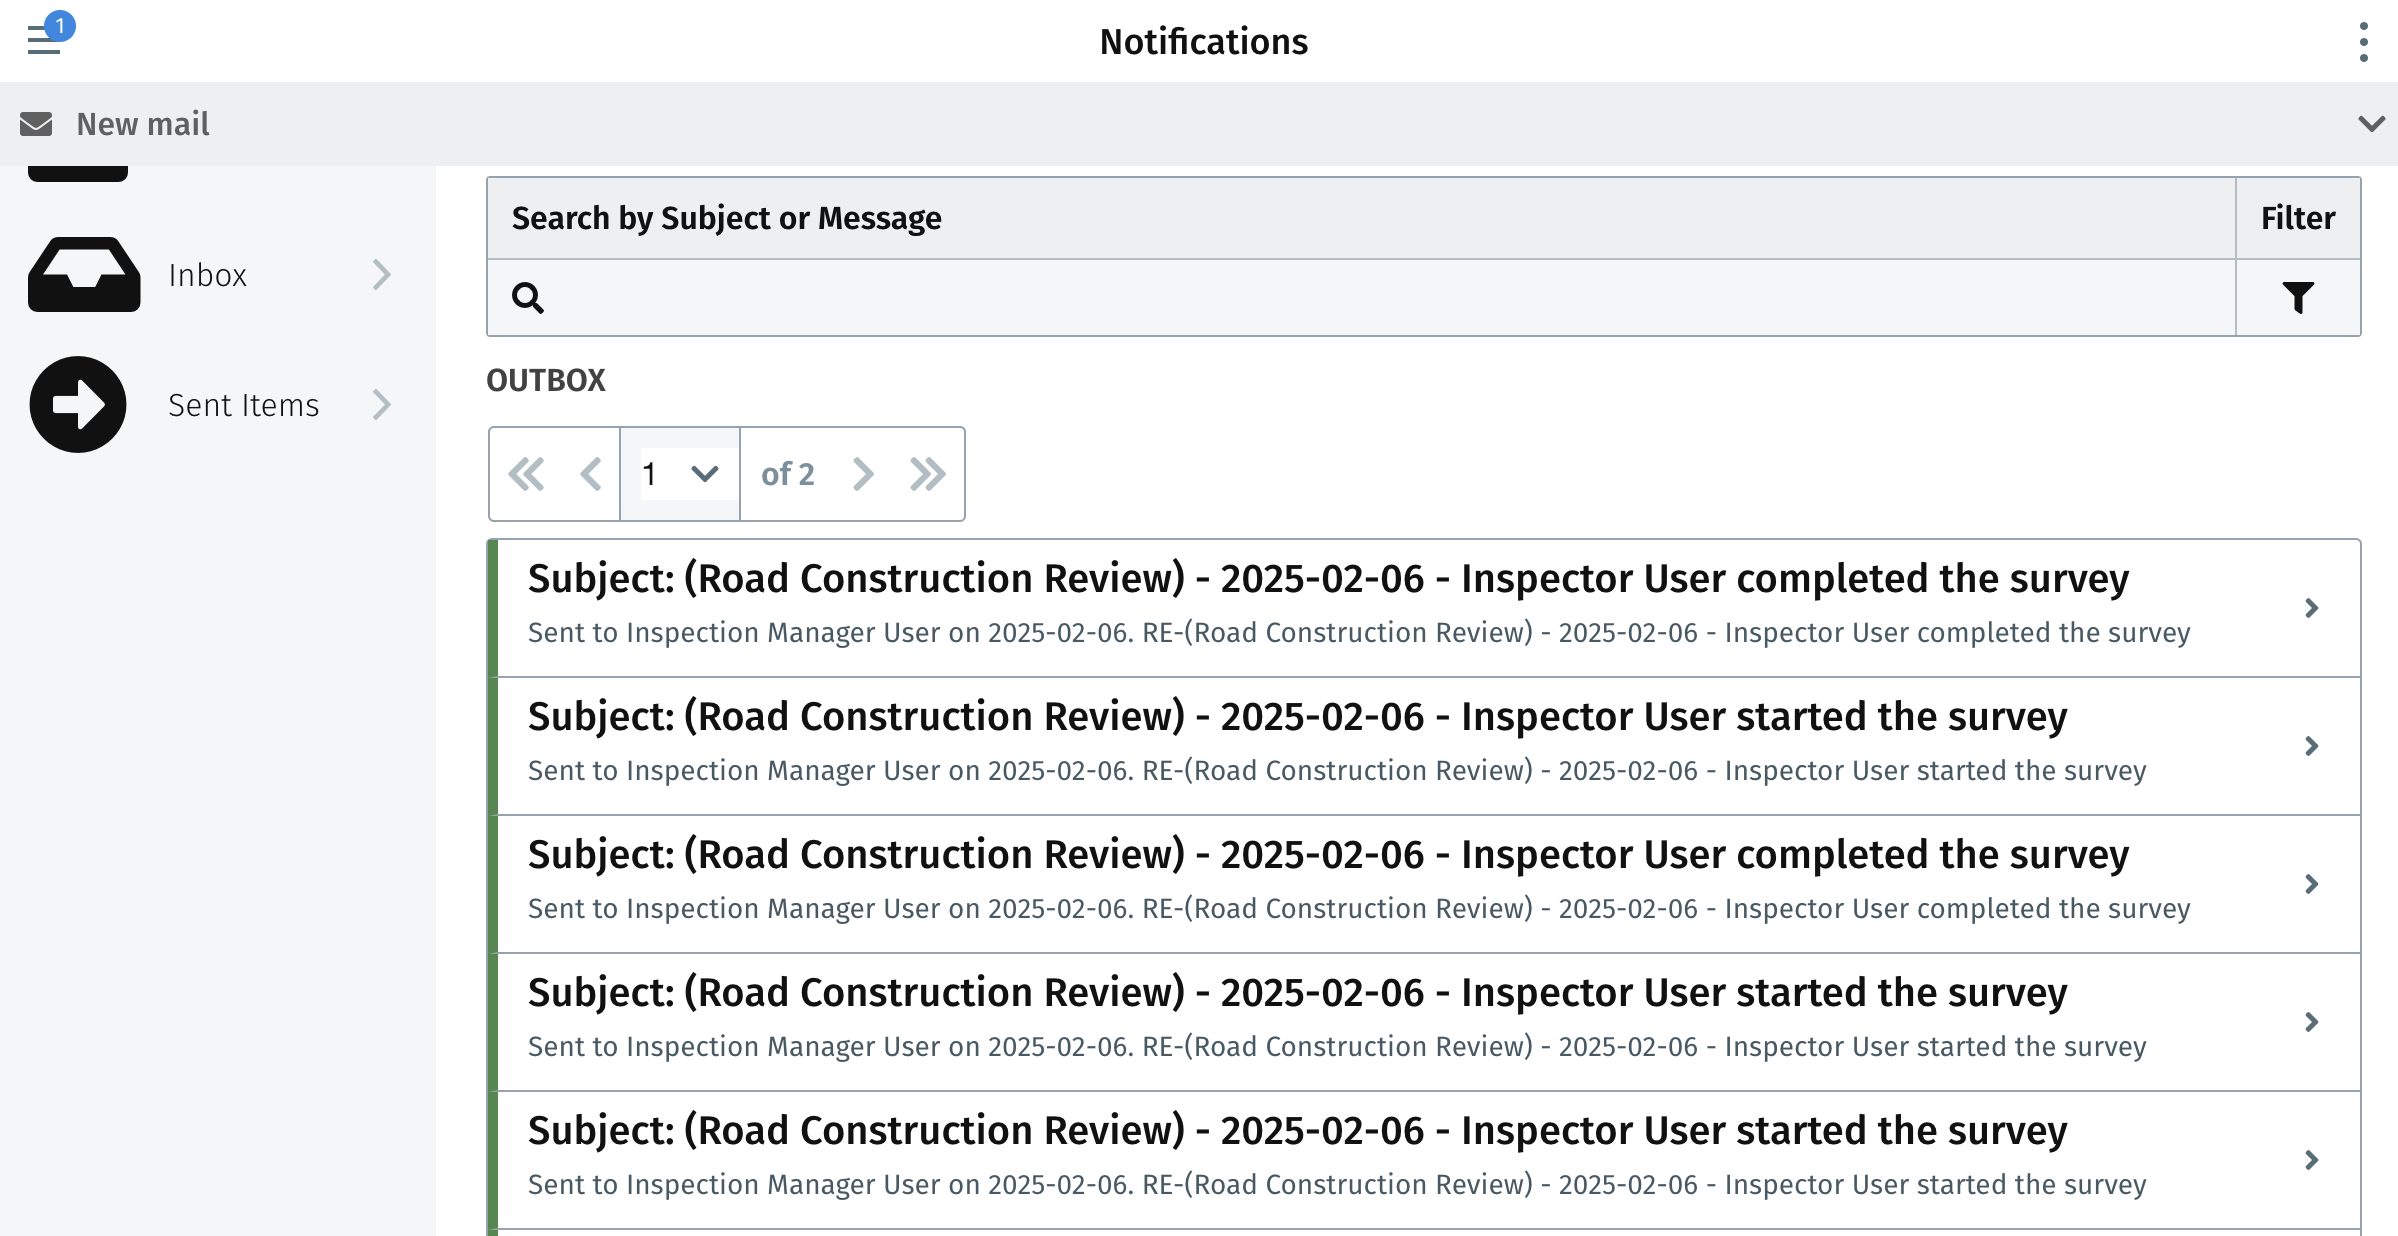
A user may also get notifications within the inspection management app. They can view these notifications by selecting “notifications’ from the main navigation menu. Once a user navigates to the notifications page they are brought to their inbox where they can select and view the notification. Inspectors can also search and filter their notifications using the search bar and filter icon.

Inspectors are also able to view their sent items by selecting “Sent Items” within the secondary navigation on the lefthand side of their screen.
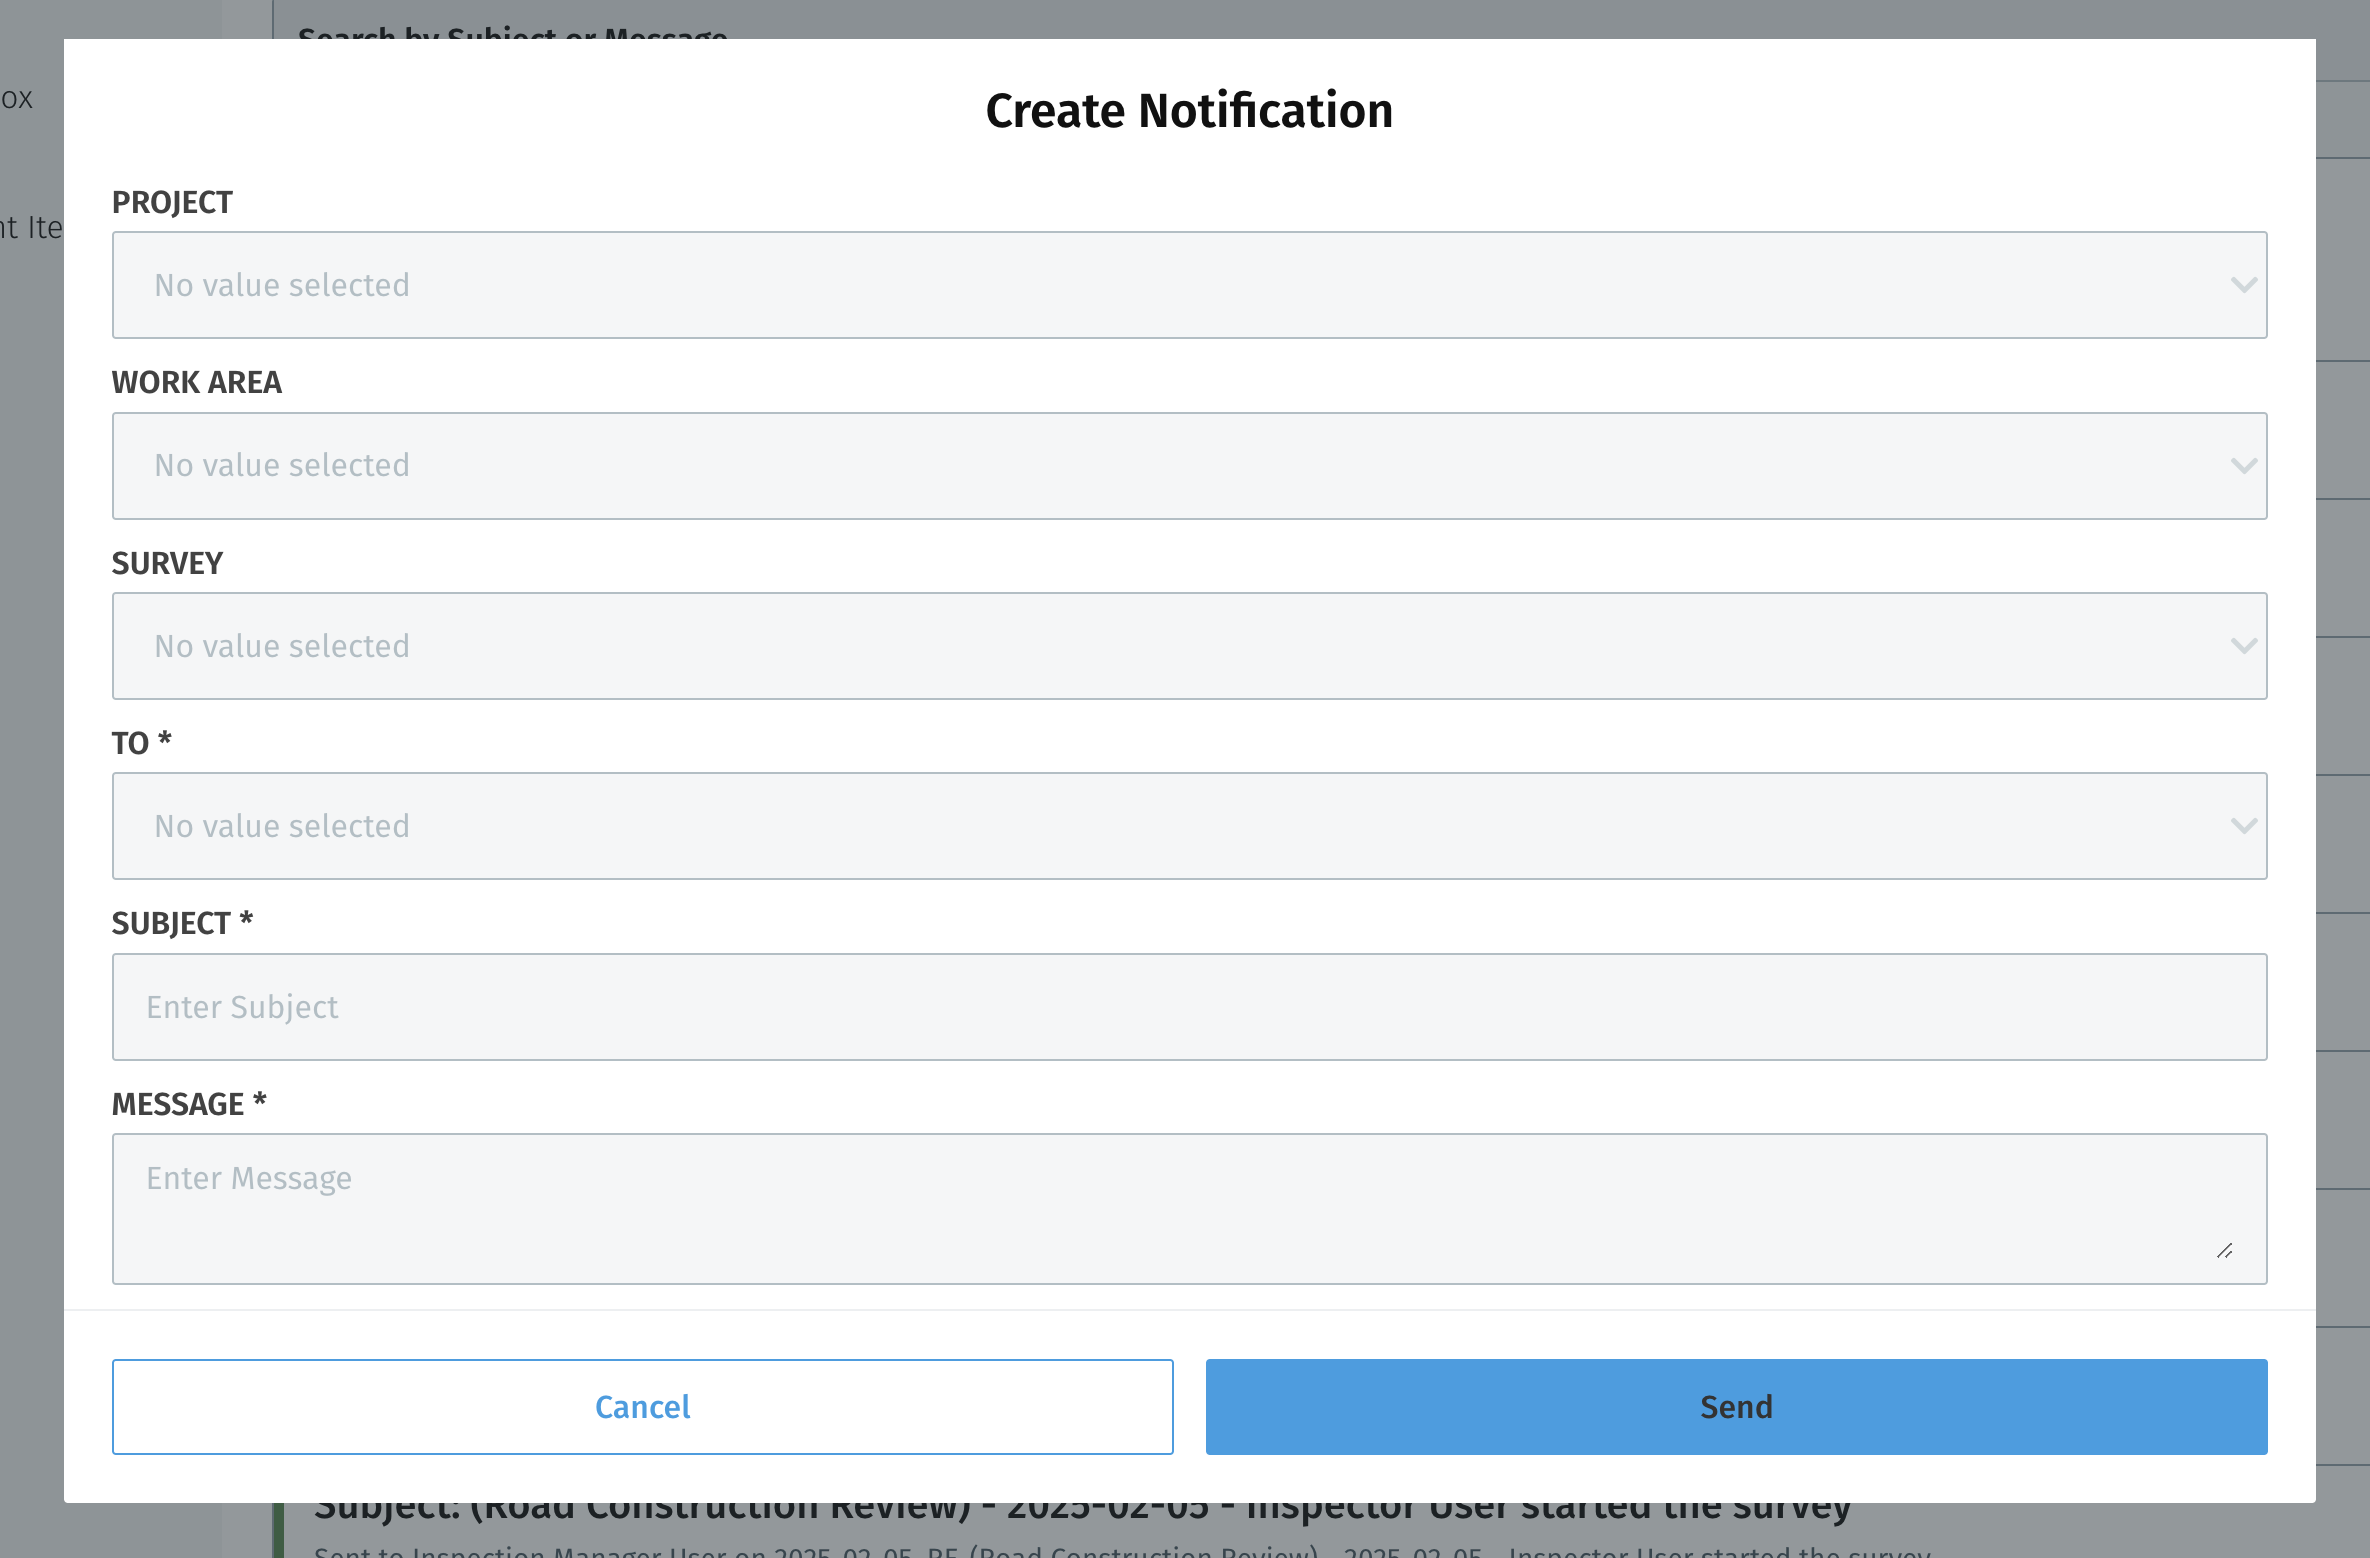
Inspectors can also send notifications to their team easily through the inspection management app by going to “New Mail” within the secondary navigation on the lefthand side of their screen:
My Projects
Inspectors can navigate to “my projects” within the main navigation and be brought to the projects landing page where they can view their projects and project details including project name, percentage complete, and any notifications associated with the project.

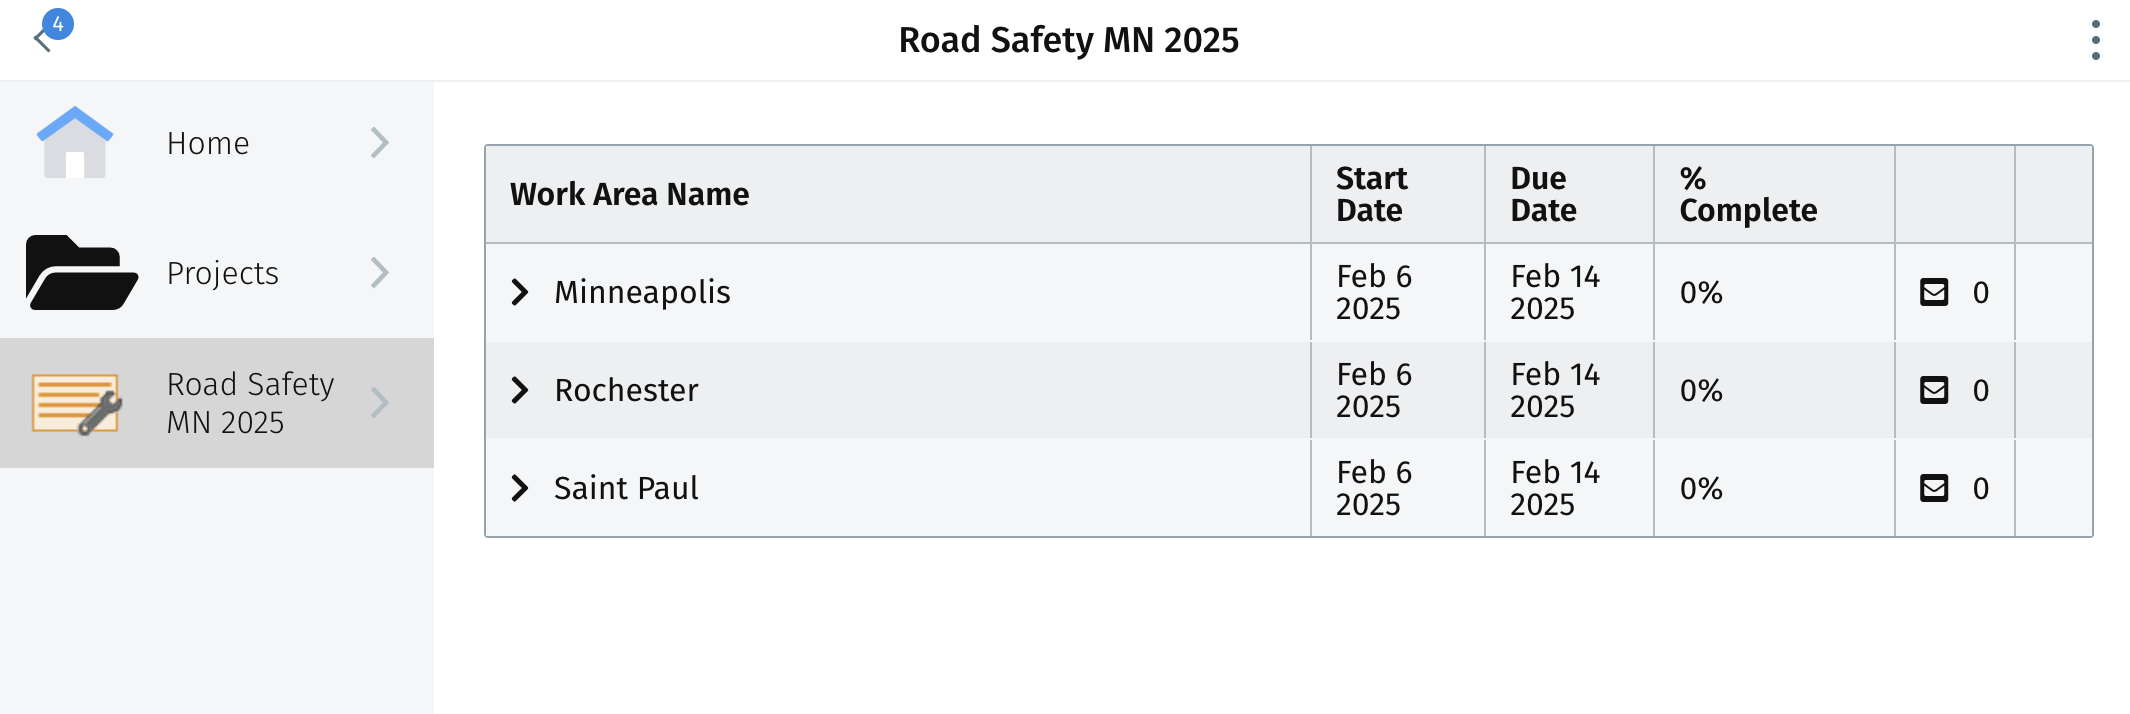
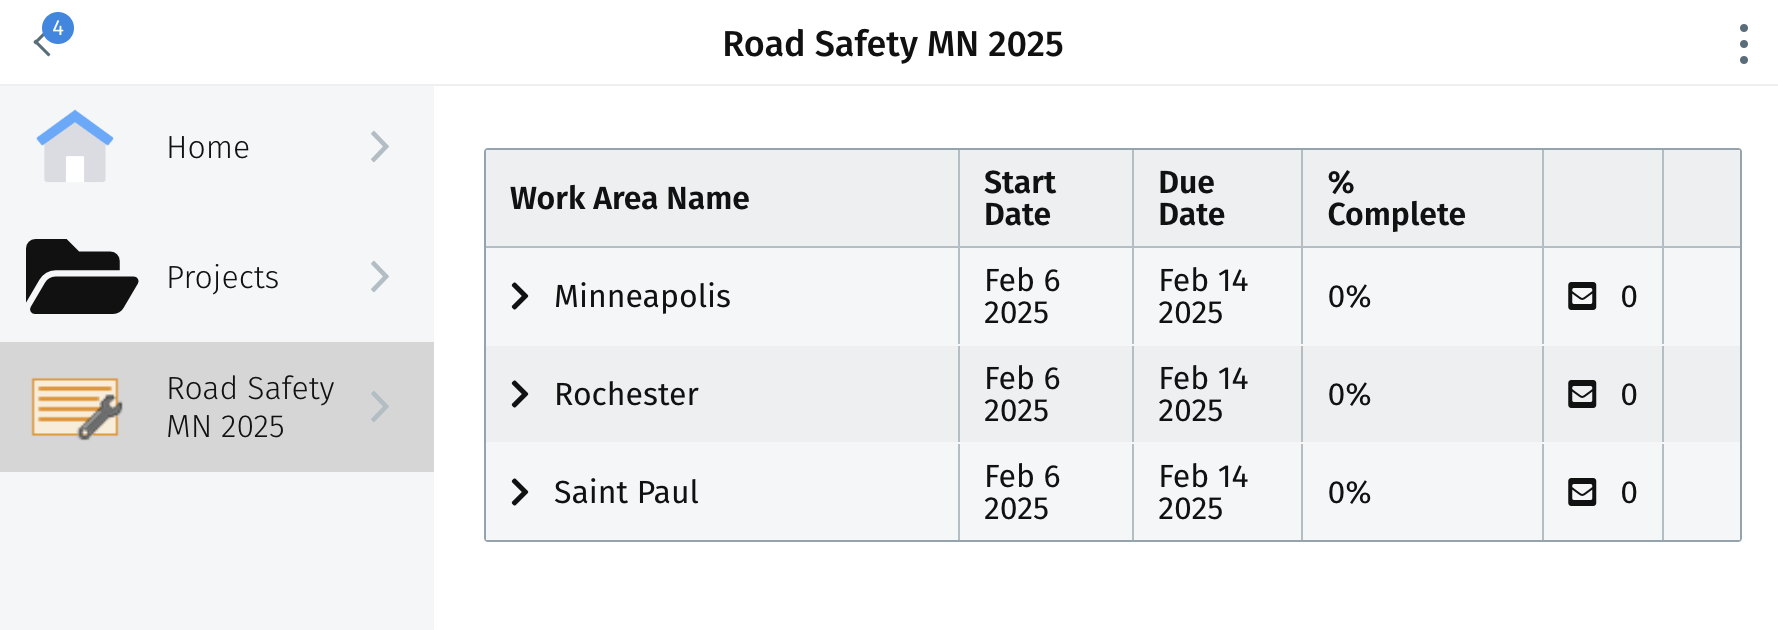
Inspectors can also select the project and be directed to the project details page to view work areas, their start and end dates, percentage complete, and any notifications associated with the work area within the project
If further insight is needed, inspectors can also select the work area within the project and be directed to the work area details page
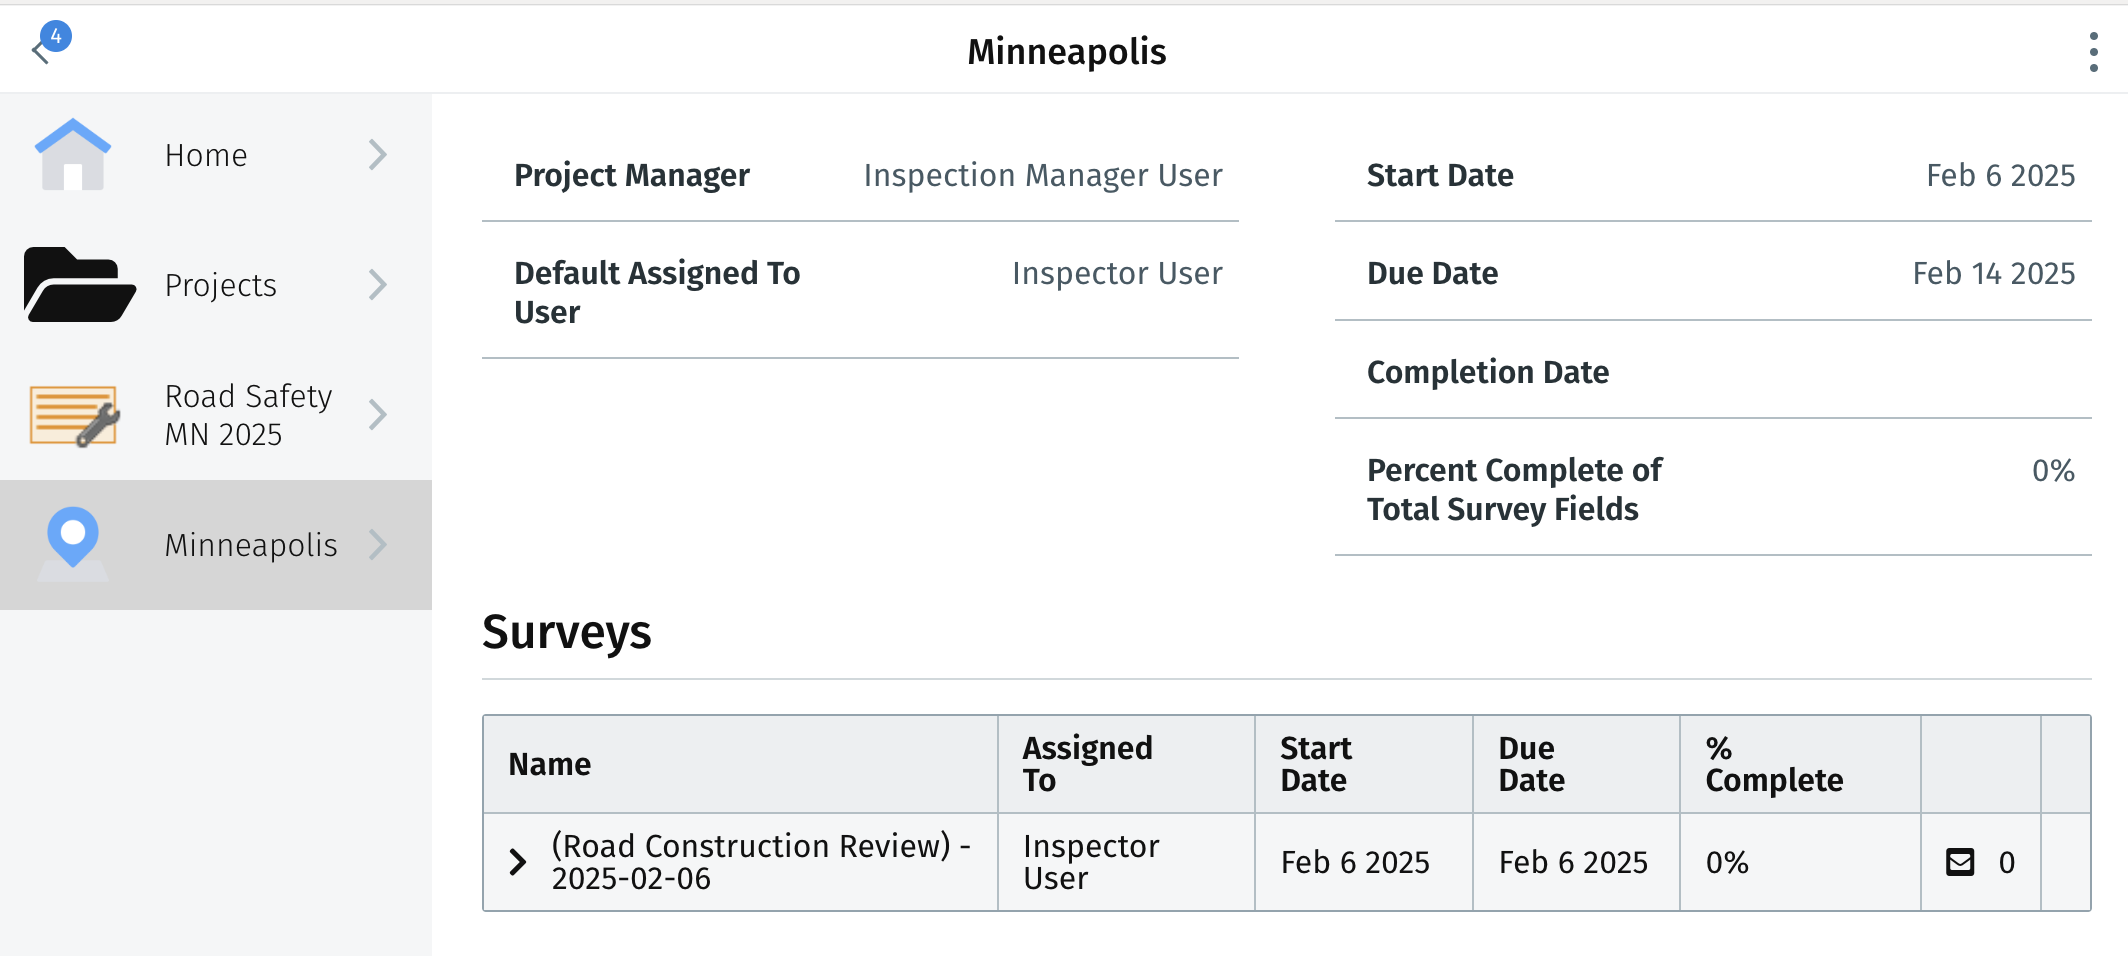
The work area details page also highlights the surveys associated with the work area and details regarding the survey.
Search
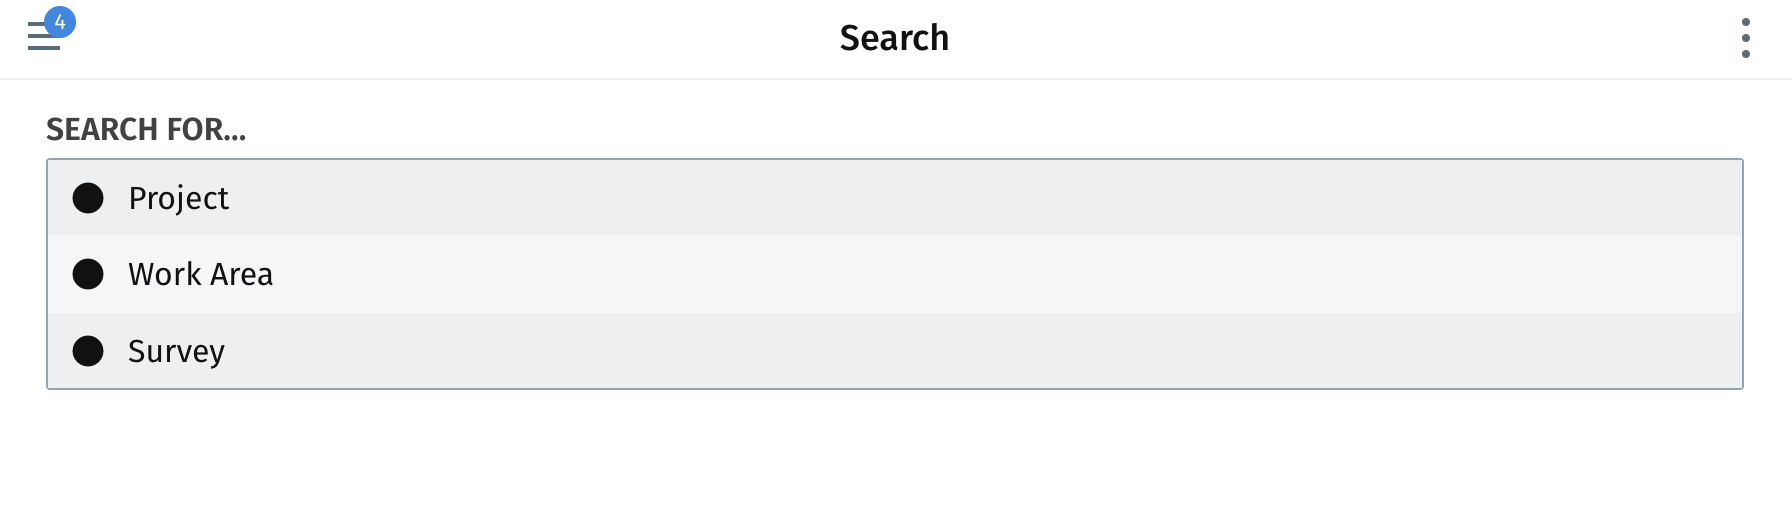
Inspectors can search their inspection management application by selecting “Search” within the main navigation. Once they are directed to the search landing page they can search by project, work area, or survey.
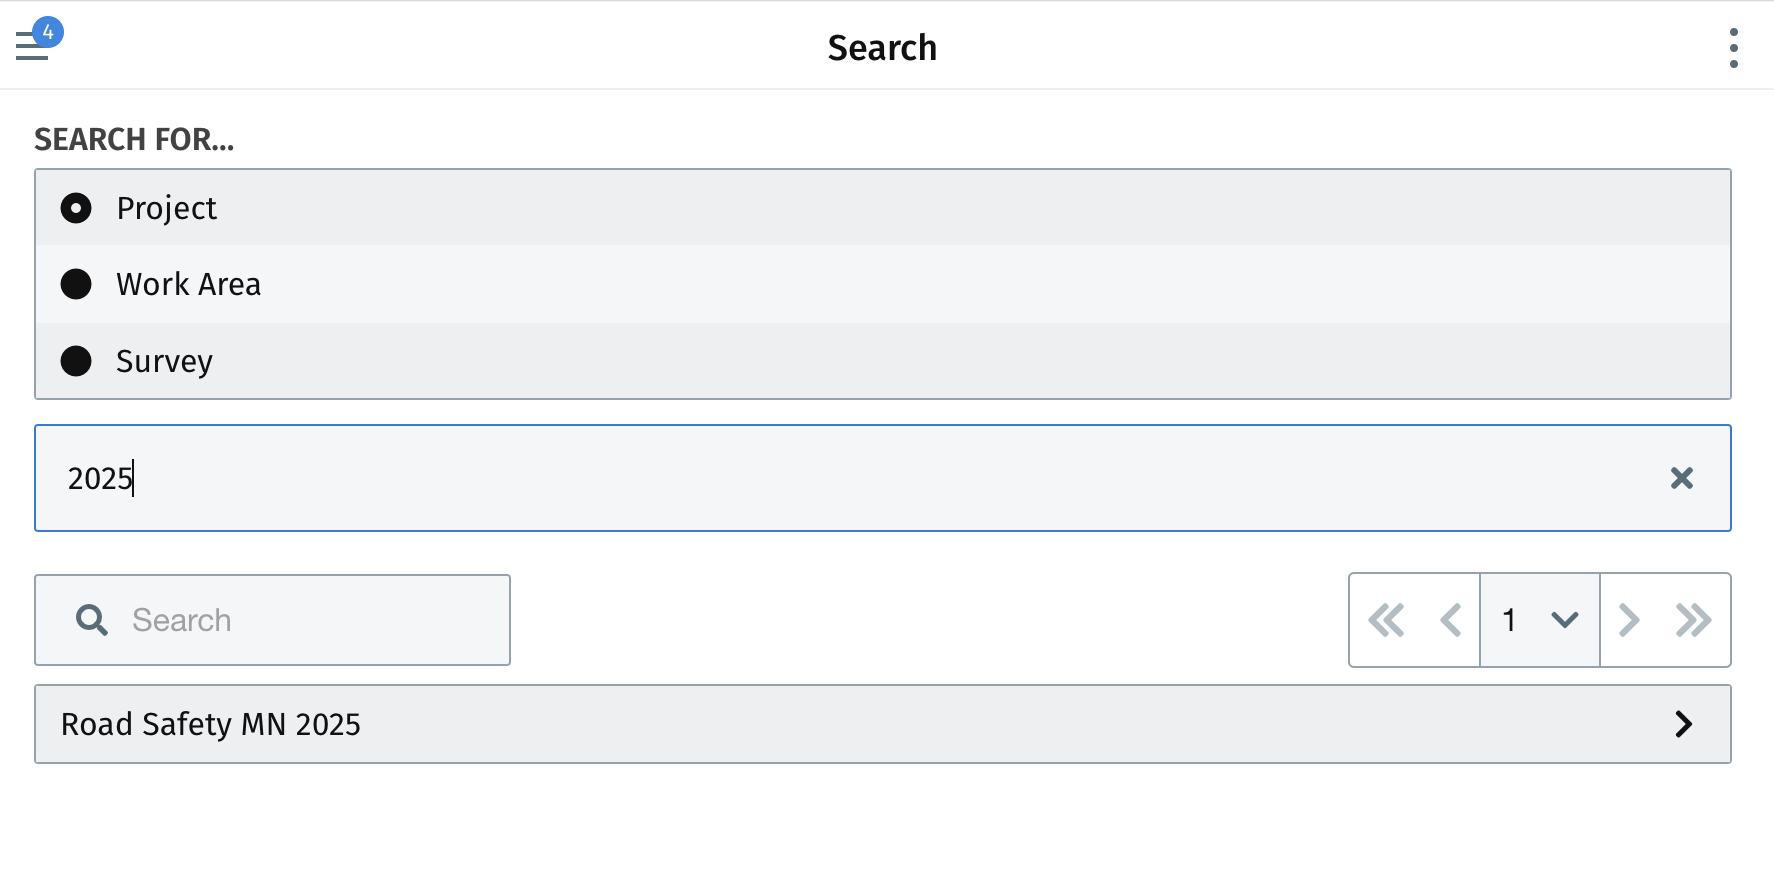
Once a user selects which option they would like to search by, the search bar appears where a user can search using a keyword:
Once a user finds the results they want, they can select that result and be brought to a page to view/ edit the result:
Role/ Account Info
Inspectors are able to view their account information by going to the “Role/Account Info” section within the main navigation and selecting their account name. They are then brought to their account information page.
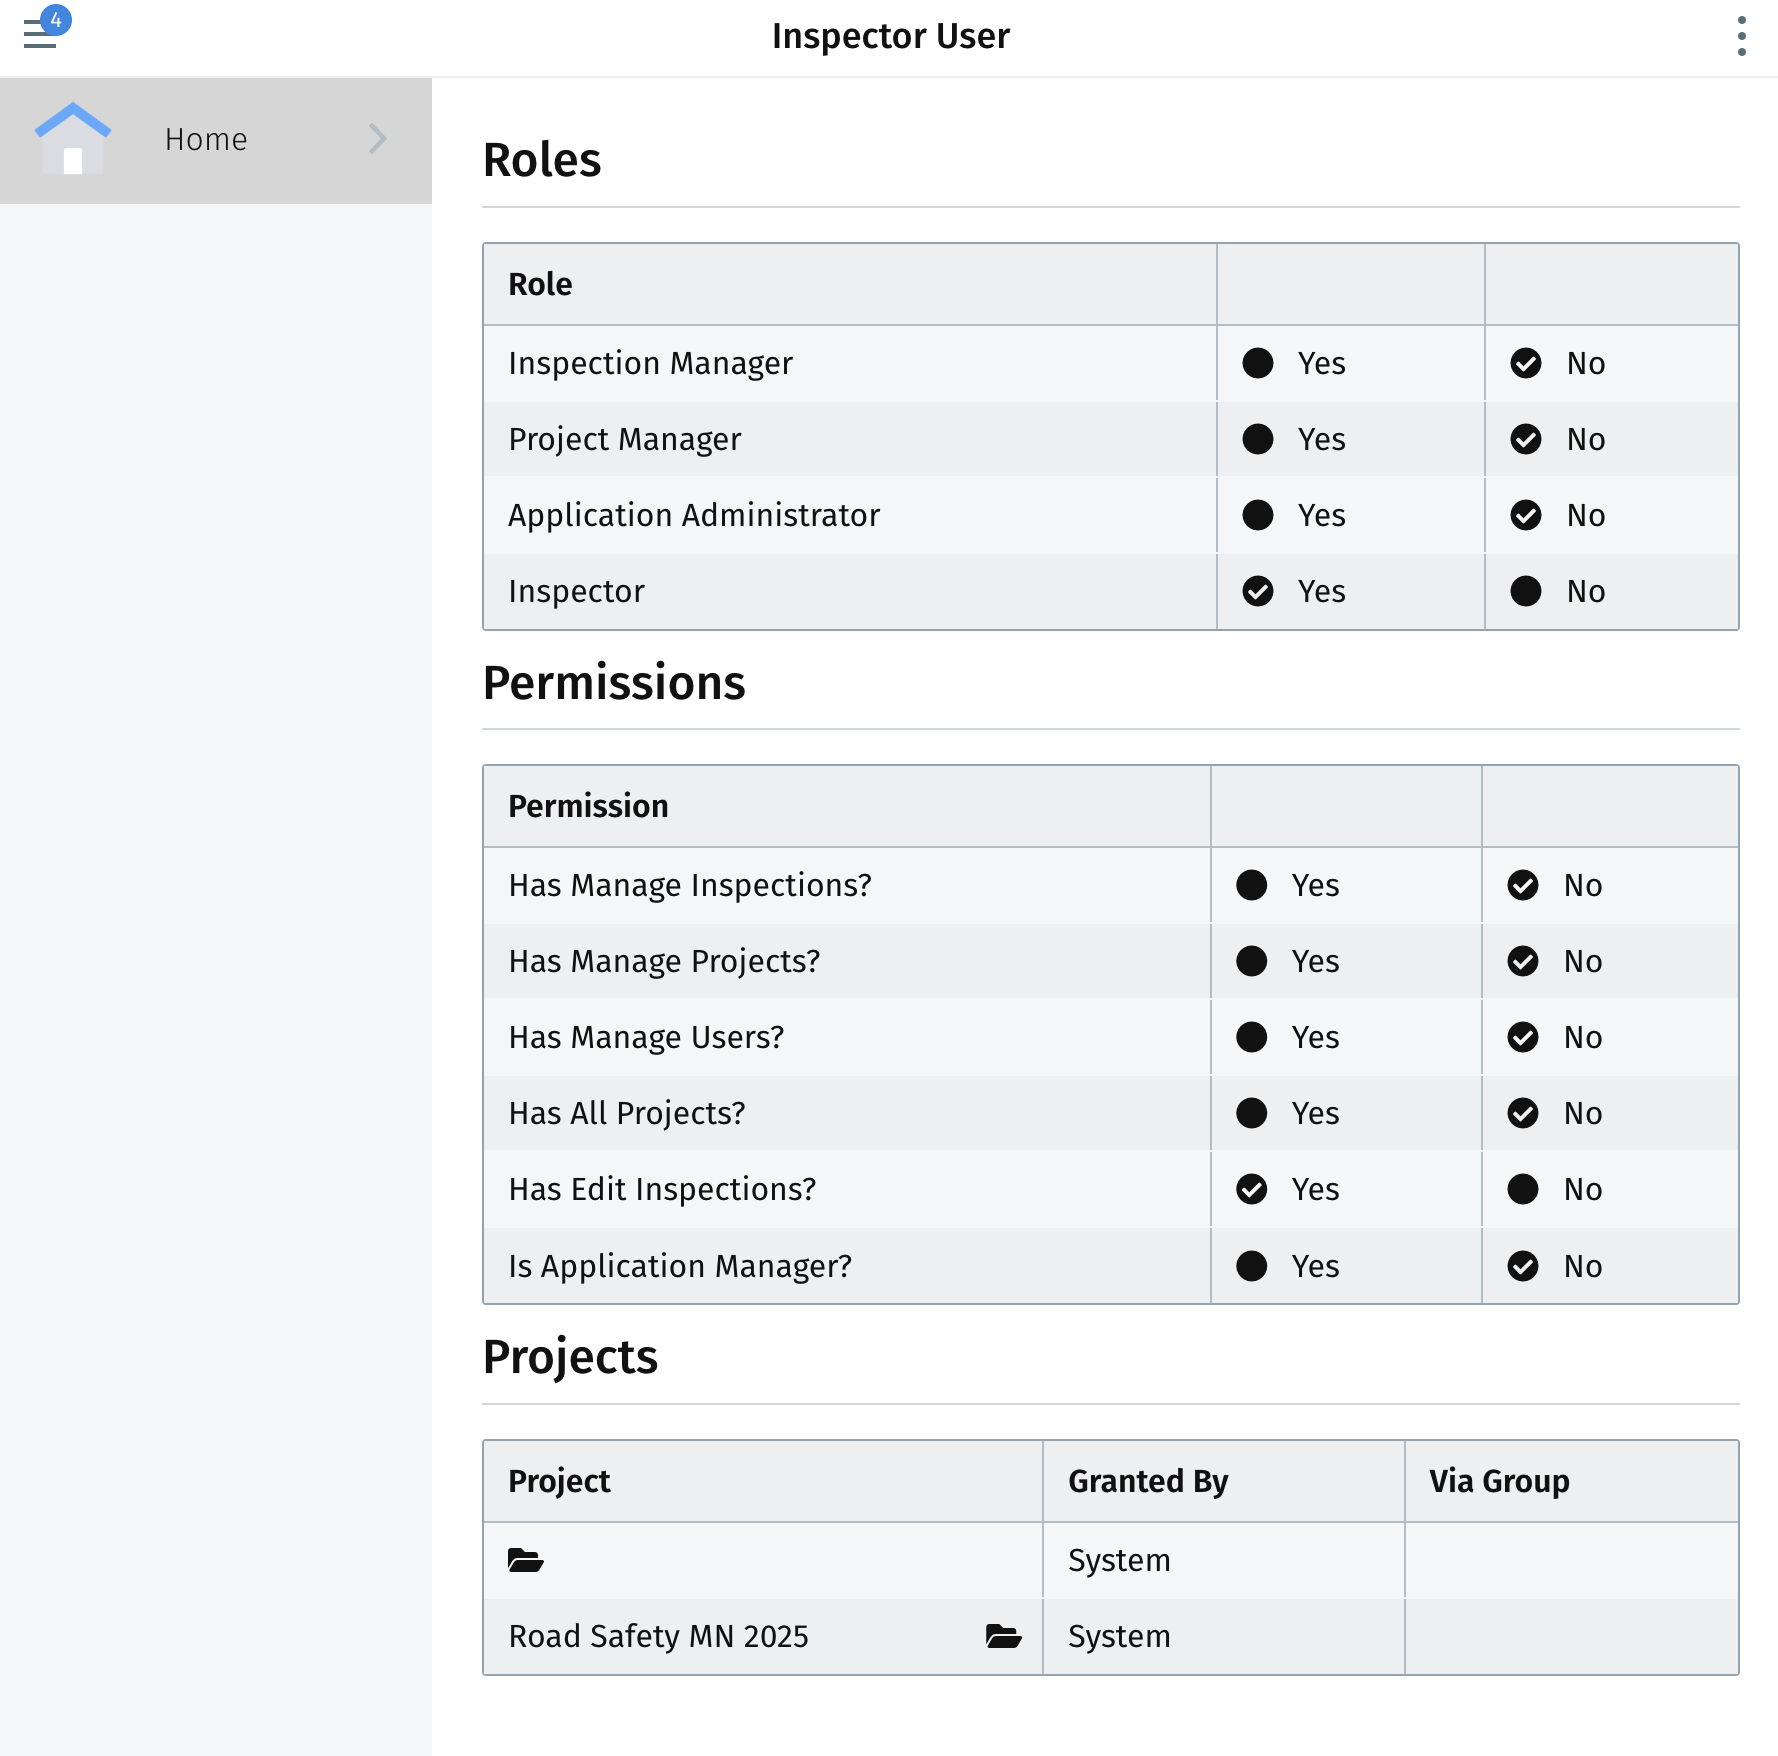
On this page Inspectors can view the roles applicable to their Inspection Management application and view the role they are assigned.
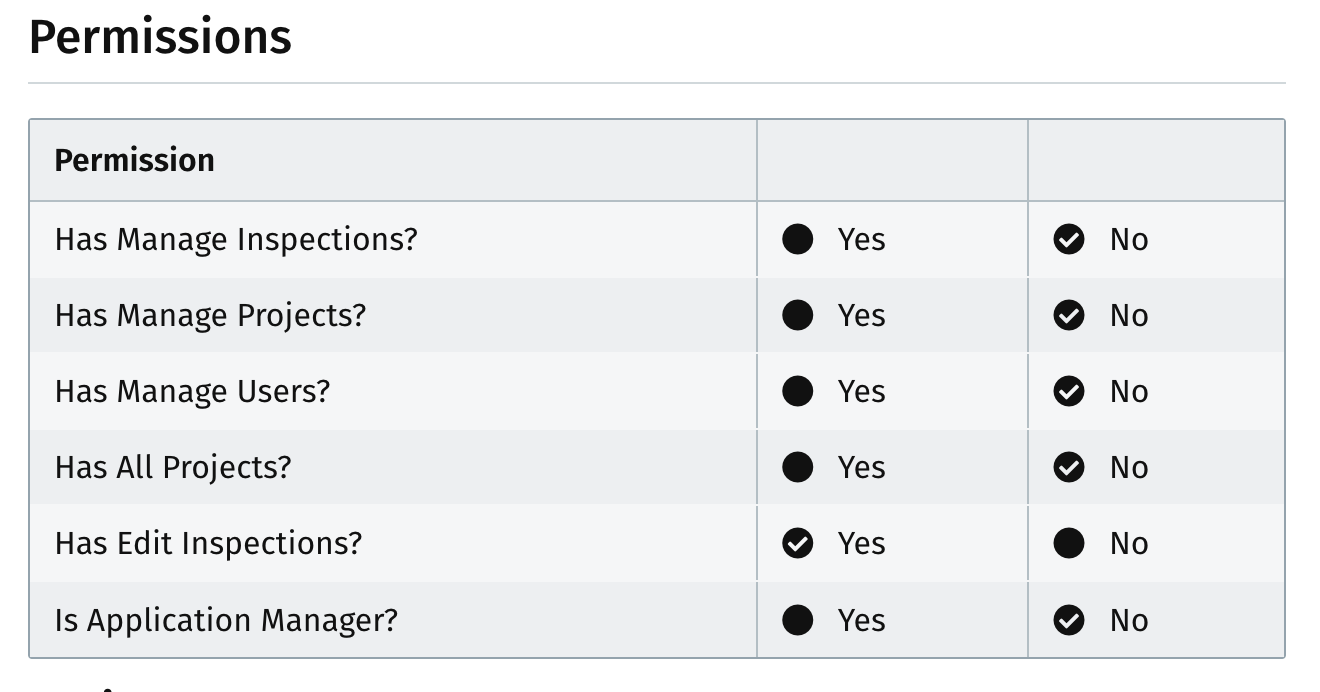
The account page also notes the permissions a user has access to do within the application within the “Permissions” section of their account.
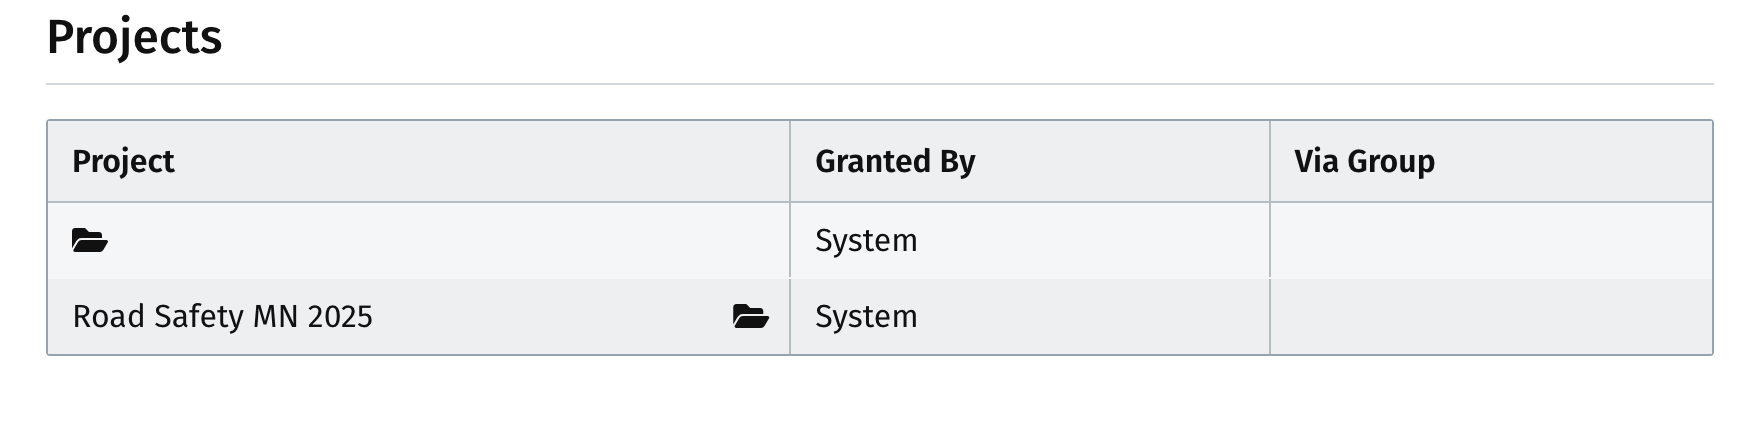
Inspectors can also view the projects they are assigned to within their account by viewing the “Projects” section of the account page. This allows Inspectors to view the project name, who it was granted by, and via what group. If they want to view the project in more detail, they can select the folder icon next to the project name and be directed to that project’s detail page