Installation
The JA Integration vault app enables communication between M-Files and Journey Apps. The steps to install are:
- Download the zipped file provided by TEAM and extract it to desktop
- Open the M-Files Administration Utility
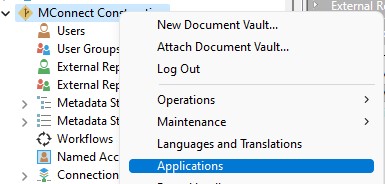
- On the left side pane, right click on the vault you wish to install, then click “Applications”
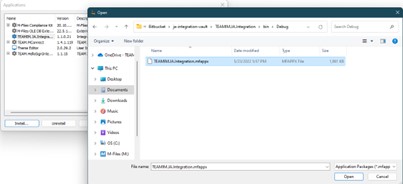
- In Applications, click on Install, and navigate to the .mfappx file in the extracted folder
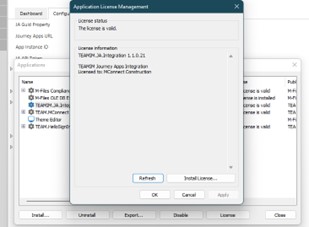
- Click on the installed vault app, then click “License”. A license management popup will open.
- Click on “Install License” and select the .lic file provided in the extracted folder. Confirm that the license is valid. If it is not, please contact TEAM Support.
To authorize JA API calls, we authenticate using the App Instance ID, and the API token. To retrieve these, you must have admin permissions on the JourneyApps data browser. Here are the steps:
- Login to Oxide via https://oxide.journeyapps.com. Oxide is an 100% browser-based IDE that allows you to develop JourneyApps applications which includes managing deployments.
- In Oxide, click on “Data Browser”, select the deployment you wish to use

- In the data browser, click on the upper right where your name is. Select “Manage API”.
a. If you do not see this option, attempt to “Elevate Permissions”. If this doesn’t work, contact JourneyApps support.

- In the API Management page, copy the HTTP Auth Username guid. This is the App Instance ID.
- Next, click “Create Token”, give it a token name, and then click “Create”. A token should now be populated under the “Authentication Tokens” table.
- Copy this token as this will be the API Token.